1- Make a Detailed Review for the Manual Ordering Screen. (For manual ordering information, see.)
Open your service robot as specified in the robot startup instructions.
When your robot is turned on and ready for use, start your work by following the steps given below.
The locations you specify in the AR-Service application will be displayed in the manual order section of your robot.
You can see your locations by clicking the manual ordering button on the front screen.
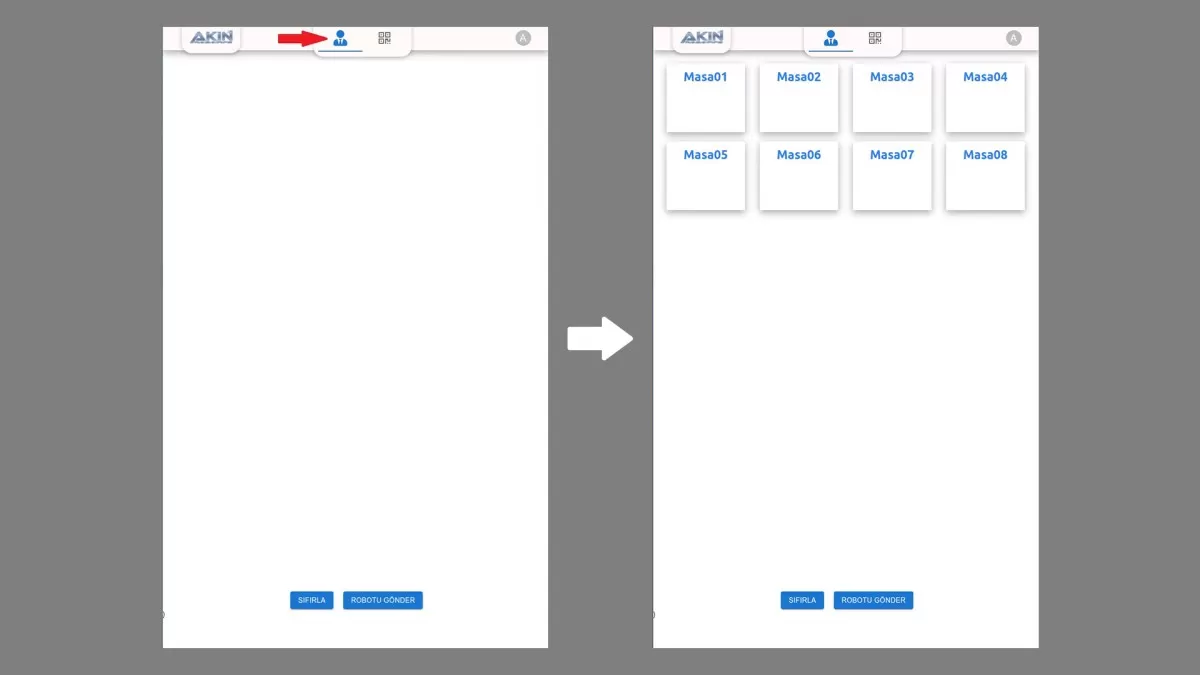
Figure 1: Manual Ordering Screen
Choose the table where the order will be taken and determine which trays it will be placed on.
Attention: The color of the trays you choose must be blue.
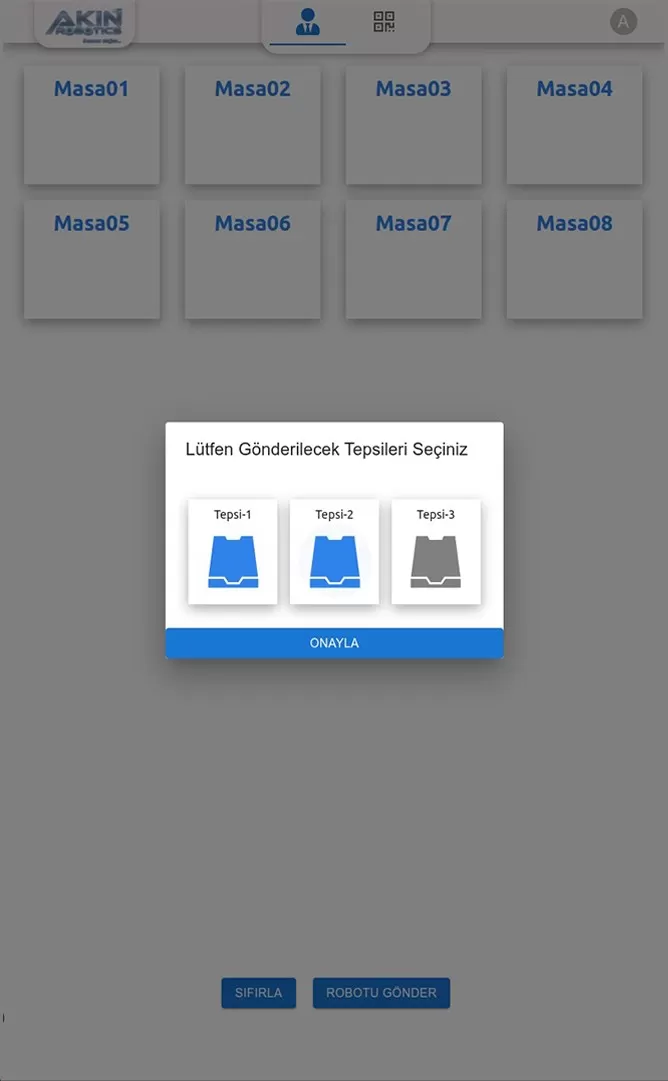
Figure 2: Tray Determination Screen
When the transactions are completed, the name of the trays will be seen on the table where the orders will be taken.
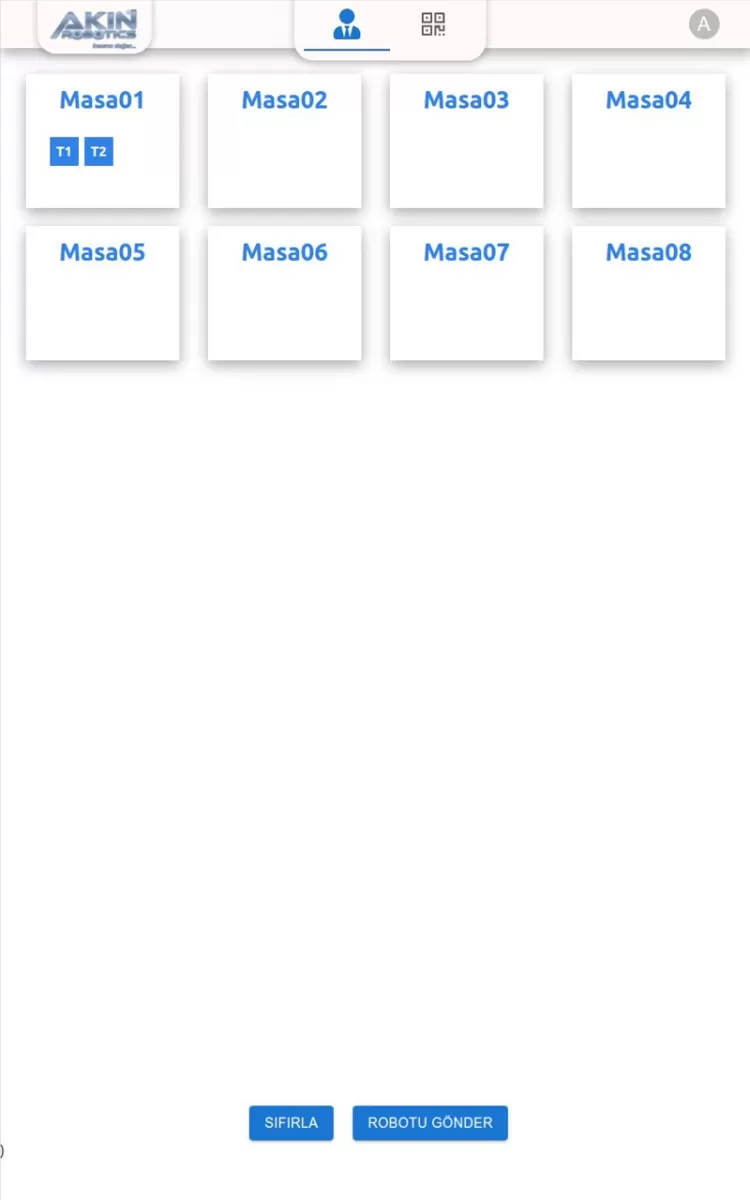
Figure 3: Orders Screen
When you want to add a new order, select the table to which the order will be delivered. There you will only be shown the empty tray. After making your selection, all your orders will appear on the homepage.
Note: You can only add to the empty tray.
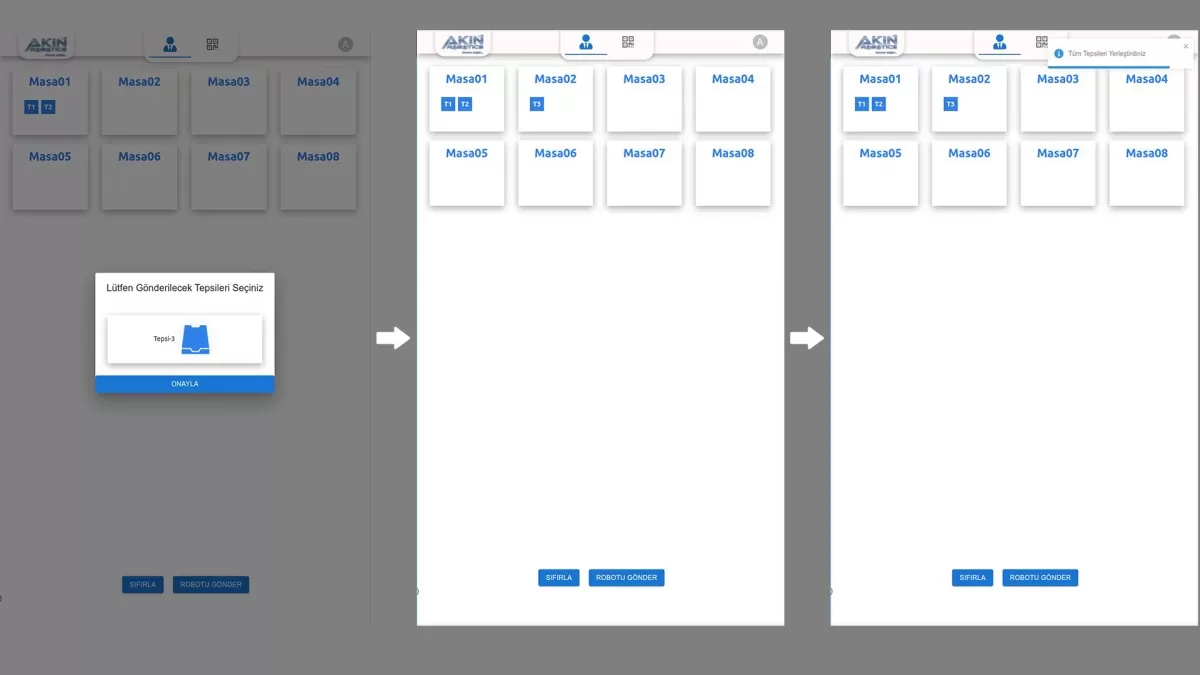
Figure 4: Display Trays Screen
After the order process is completed, click the 'Send Robot' button.
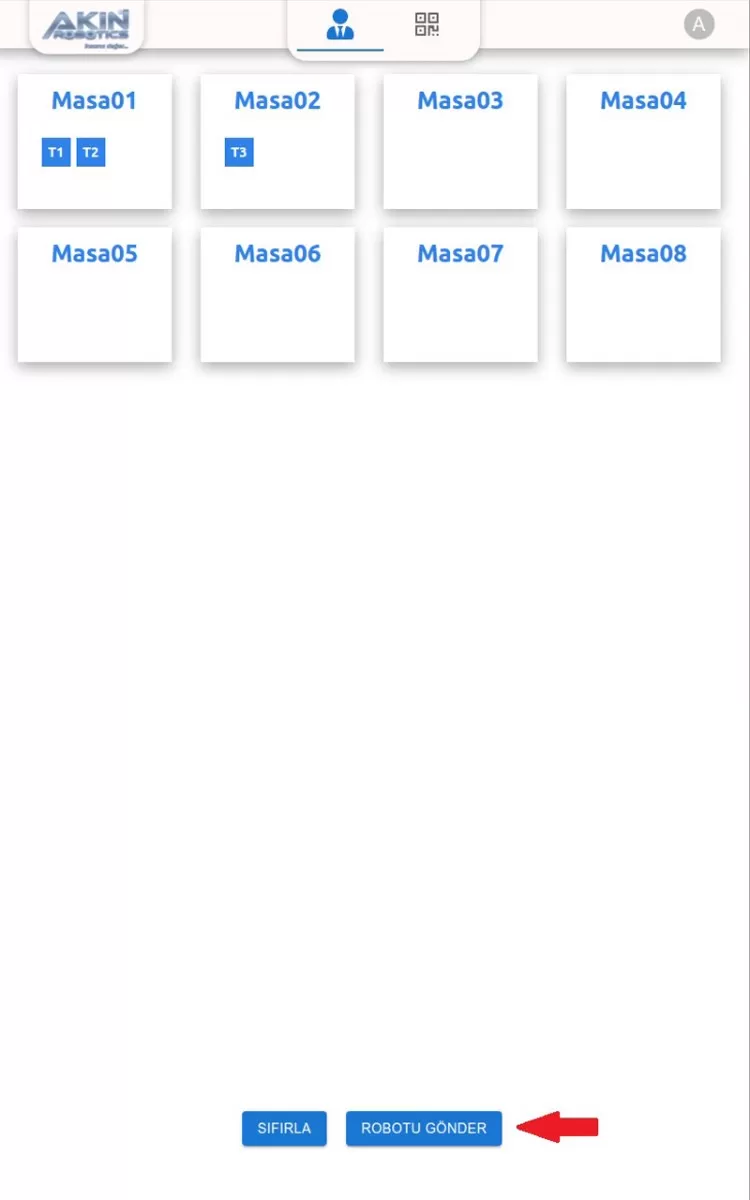
Figure 5: Send Robot Button Screen
Place the orders on the robot's tray.
Information: When the relevant orders are placed on the trays, your robot will automatically take the orders to the tables you specify.
While your robot is sending your orders to the tables, the processing steps that appear on the screen will be as follows;

Figure 6: Order Delivery Screen
2- Make a Detailed Review for the Order Screen with the QR Menu. (For order information with QR Menu, see.)
Determine the branches, menus and tables in the QR Menu given to you by Akınrobotics. Take the barcode printout of the tables you have determined and place them on your tables.
Orders placed by your customers through the QR Menu will appear on the homepage.
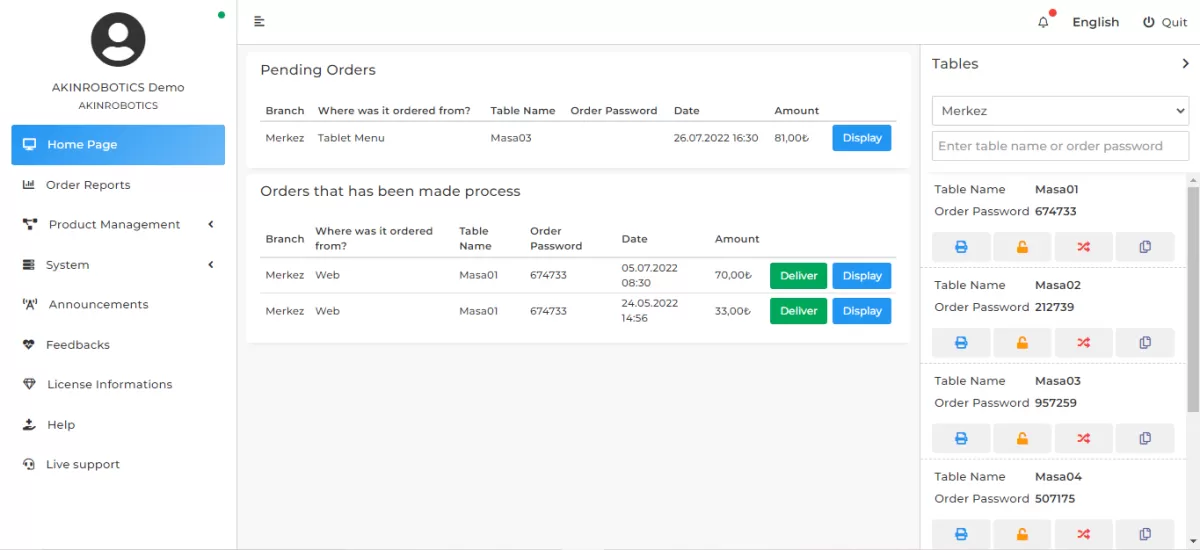
Figure 1: QR Menu Order Screen
You must confirm the orders by clicking the 'View' button.
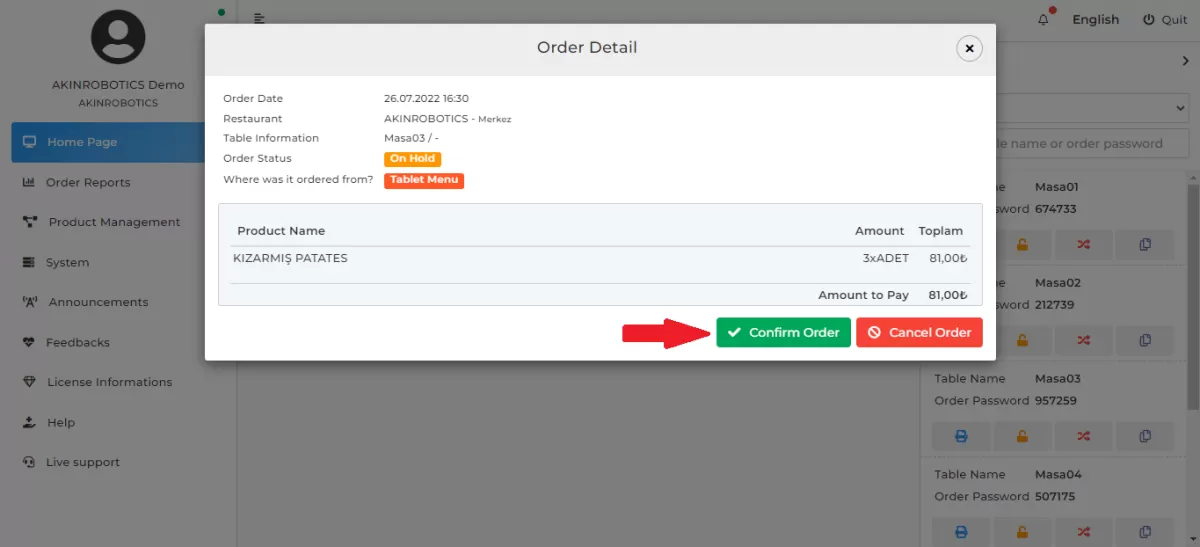
Figure 2: QR Menu Order Confirmation Screen
After the approved orders are prepared, the orders should be transferred to the robot by pressing the 'Deliver' button.
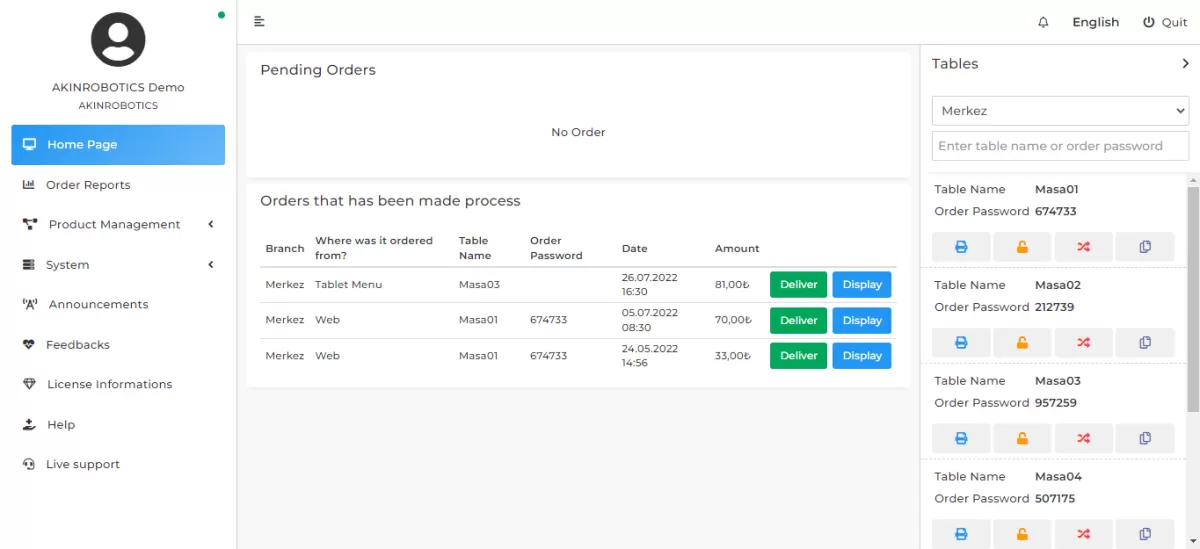
Figure 3: QR Menu Order Screen
Orders sent to your robot can be seen in the 'Orders' section of the QR Menu section. Specify the number of pieces in the order you will send and drag and drop it to the 'Tray Pieces' section.
Attention: You can divide your orders into a maximum of three parts.
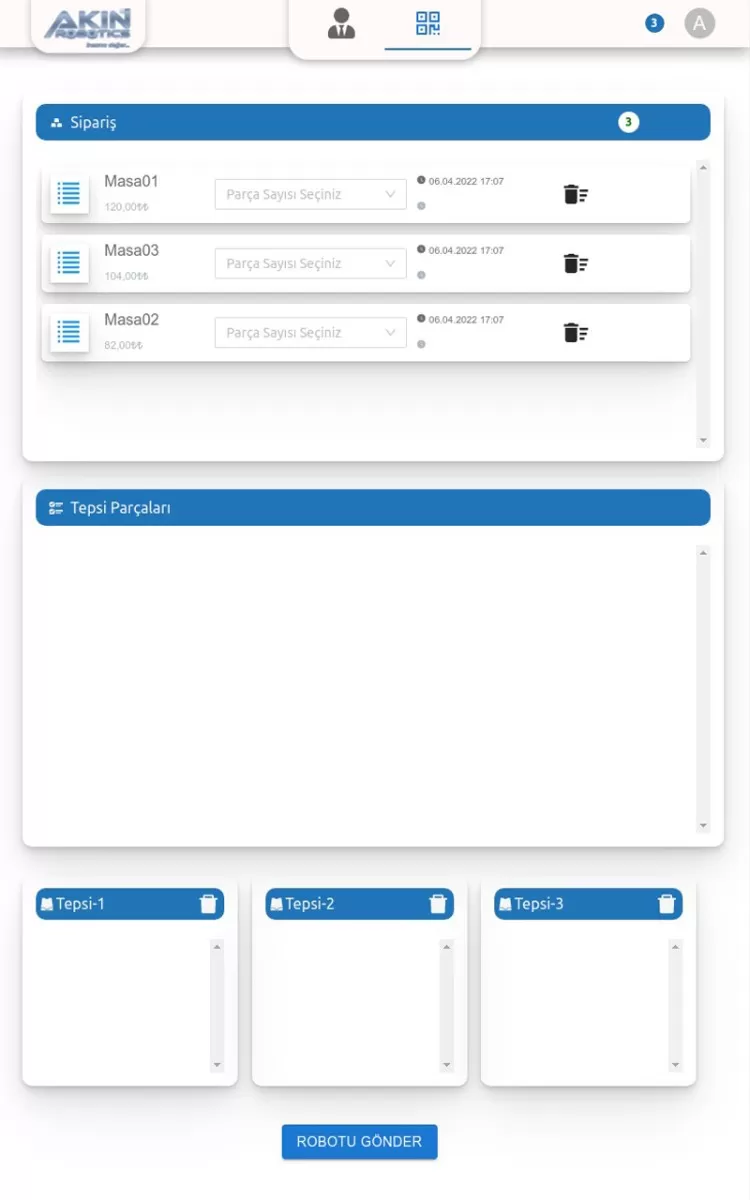
Figure 4: Robot Pre-Order Screen
Determine on which trays the orders you have divided into parts will be placed. Drag and drop your orders into the trays.
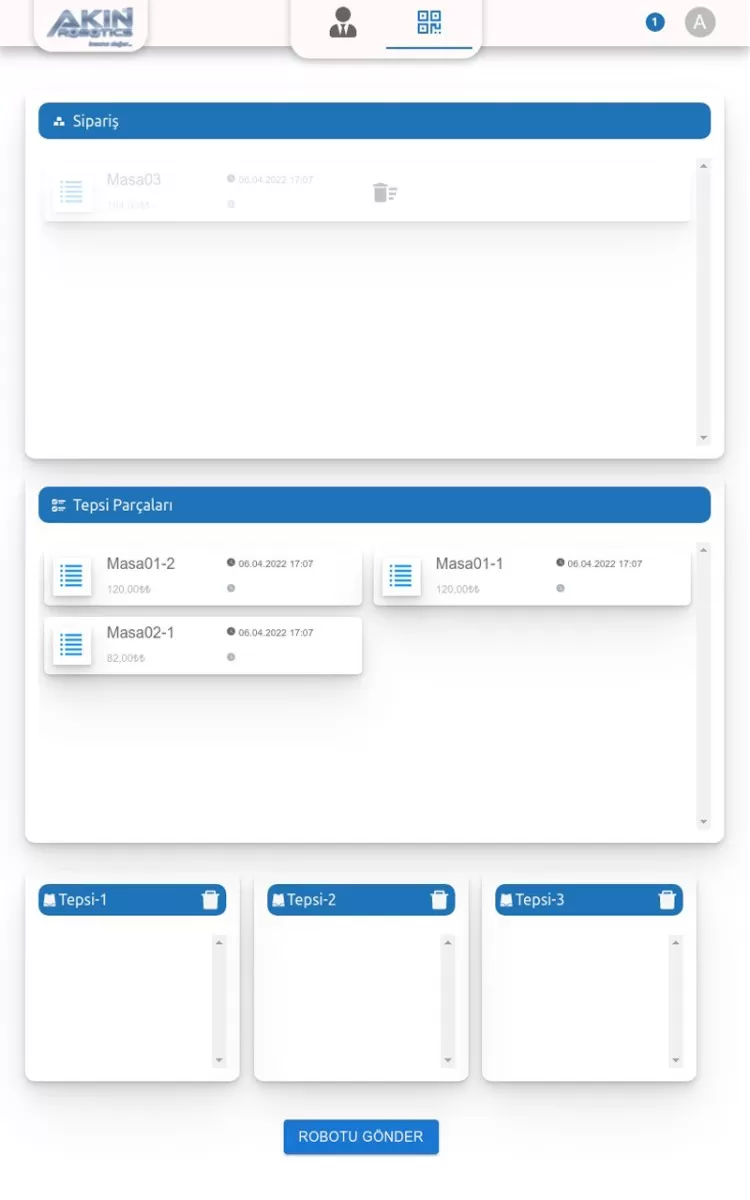
Figure 5: Robot Tray Parts Screen
Have them take the orders you have completed to the relevant tables by saying 'Send the robot'.
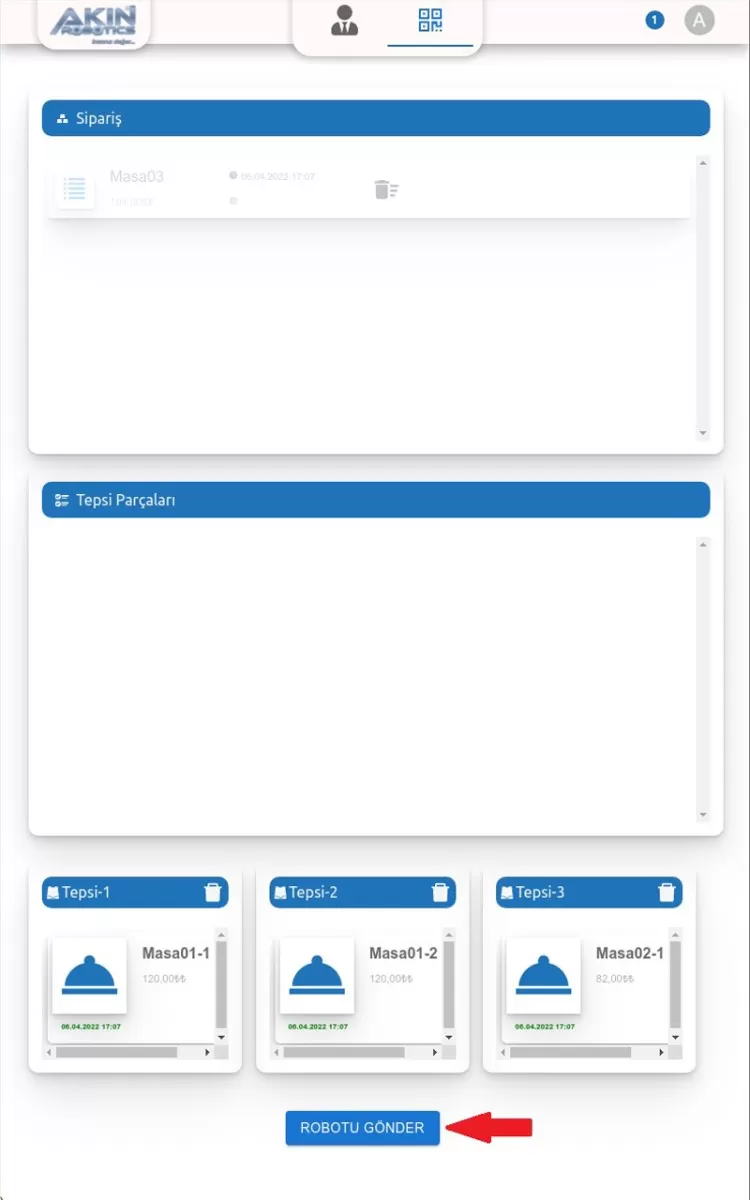
Figure 6: Sending Robot Screen
While your robot is sending your orders to the tables, the processing steps that appear on the screen will be as follows;

Figure 7: Order Delivery Screen