1- Make a Detailed Analysis for AR-Service Application General Integration Information. (For integration information, see.)
Click on the 'Add Robot' button in the AR-Service application.
In the window that opens, enter your robot's name and IP number and save it.
Information: You can learn the IP number by entering the settings menu in the application on the robot.
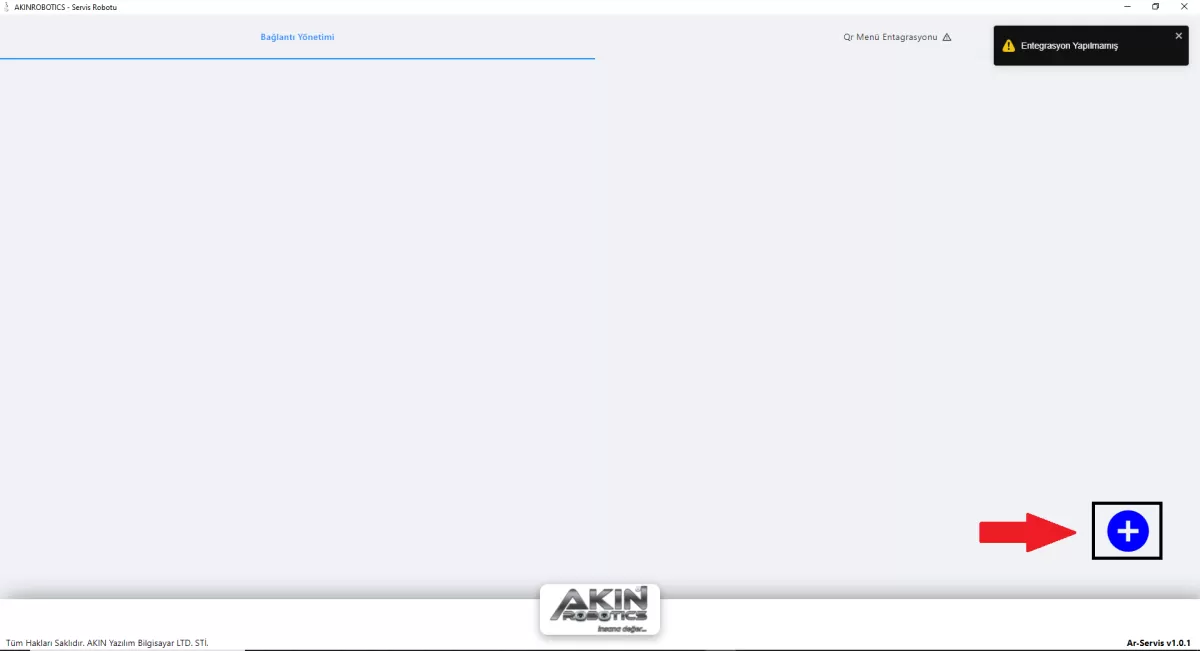
Figure 1: Add Robot Screen
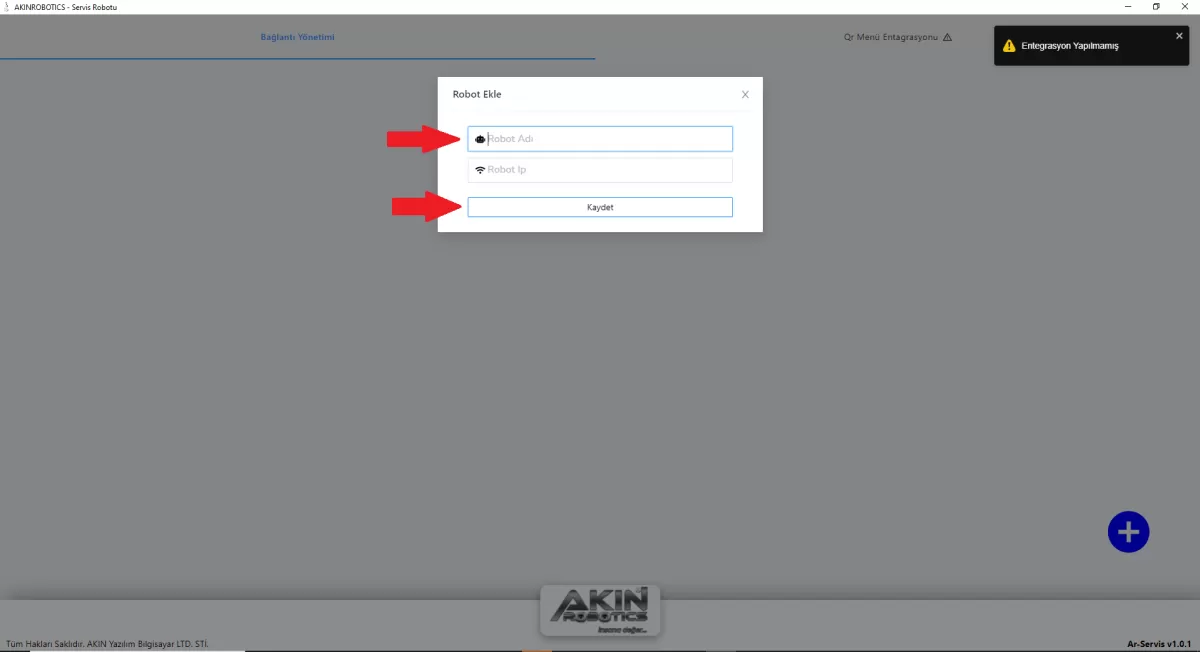
Figure 2: Robot Name and IP Screen
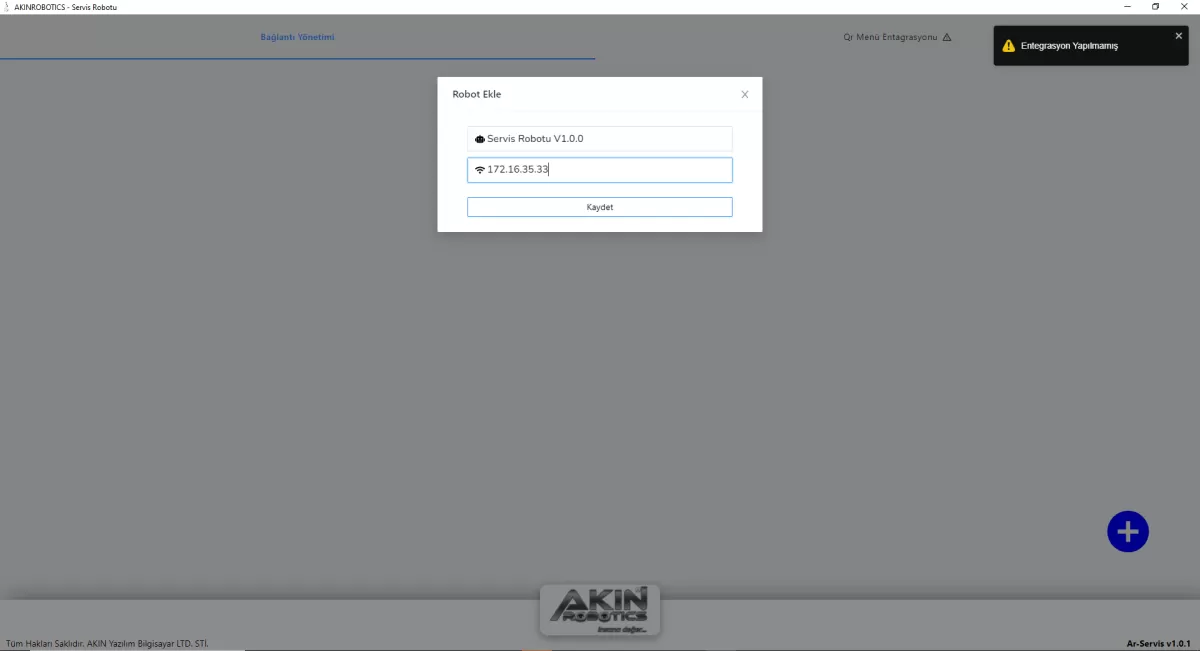
Figure 3: Robot Name and IP Registration Screen
Your robot(s) that you have registered in the Ar-Service application are listed on the 'Connection Management' page. You can edit the name and IP of your Robot(s) by right-clicking.
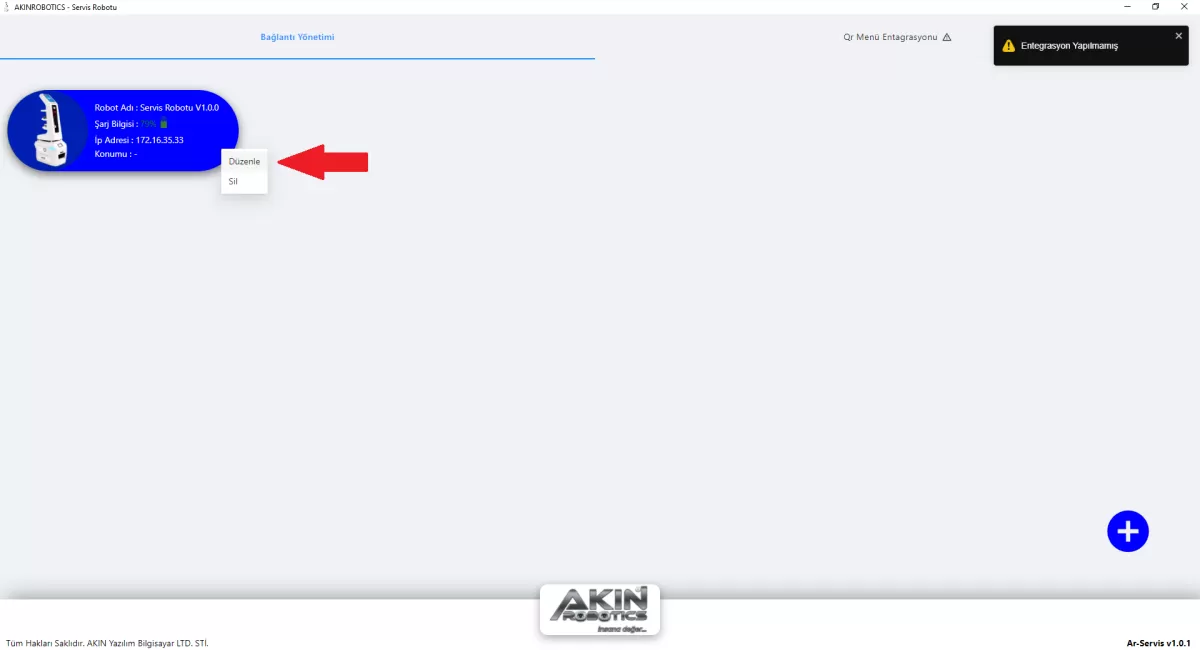
Figure 4: Robot Name and IP Edit Screen
Click on 'QR MENU INTEGRATION' in the AR-Service application. Make your integration by filling in the necessary information on the screen that opens.
Information: If no integration has been made, an exclamation icon will appear next to the 'QR MENU INTEGRATION' button. .
Attention: Users who do not purchase QR MENU INTEGRATION will not perform the integration process.
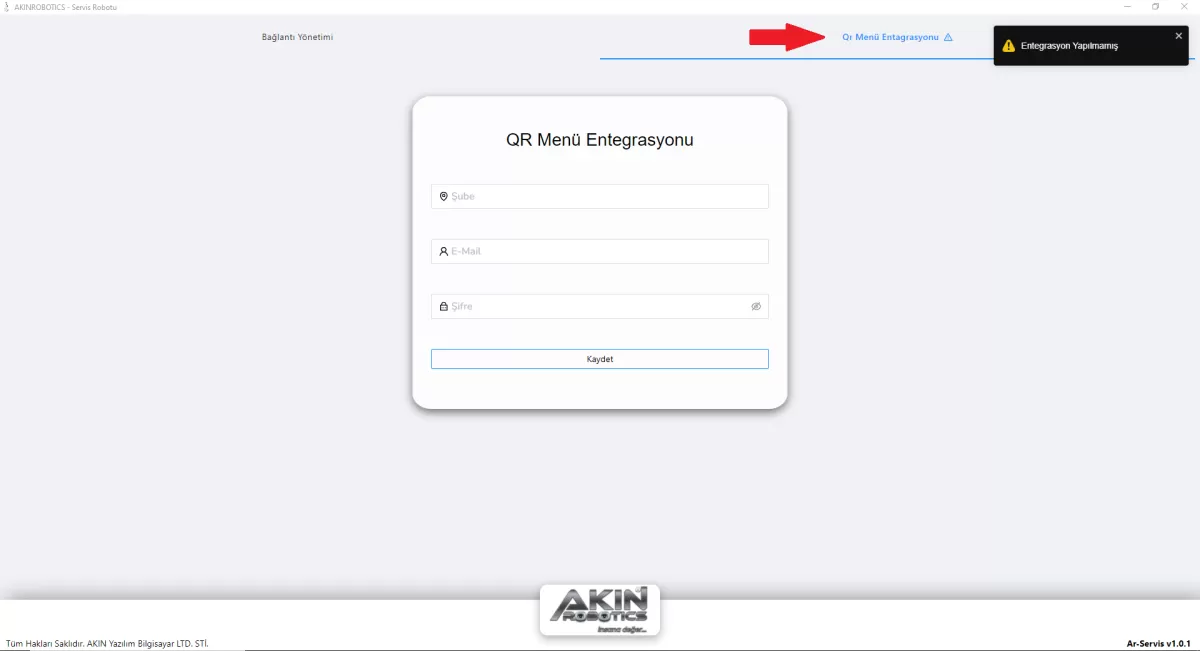
Figure 5: QR Menu Integration Screen
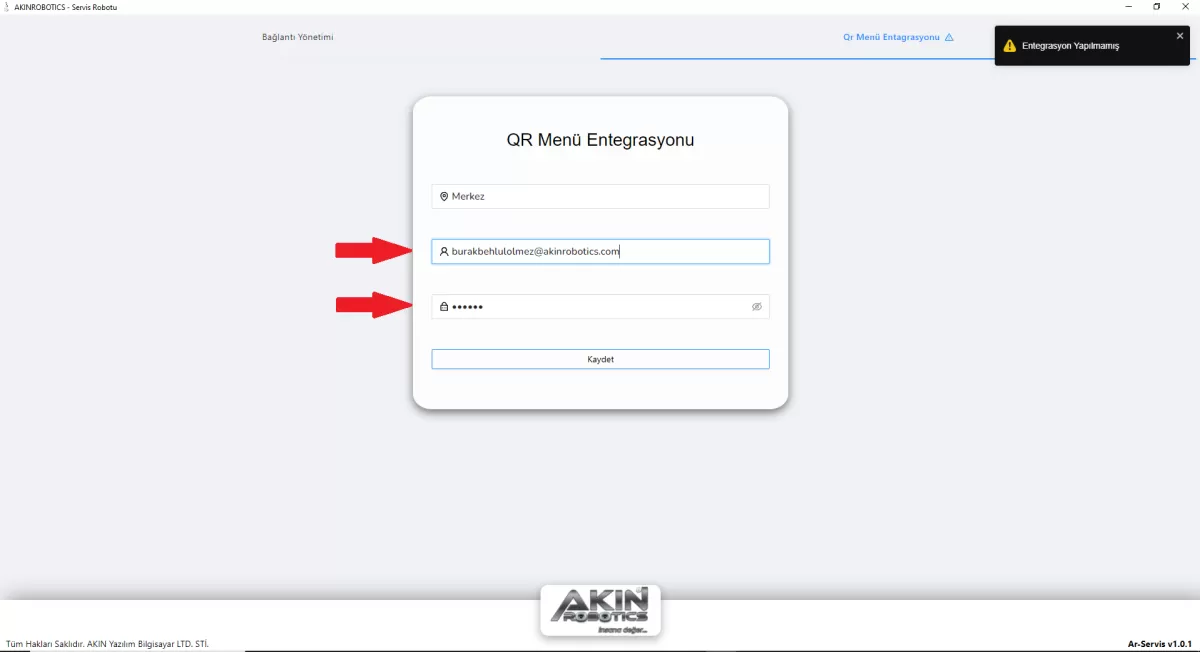
Figure 6: QR Menu Information Screen
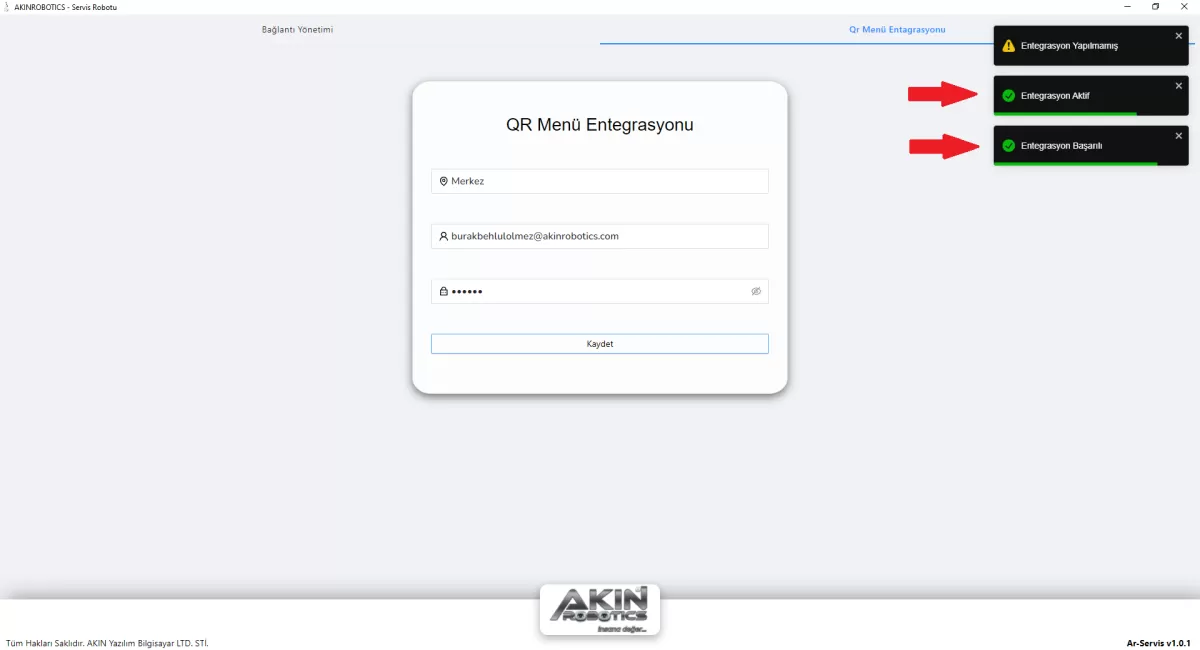
Figure 7: Integration Active Screen
AR-Service application; Click on the robot you will install from the Connection Management menu. Login with the username and password provided by Akınrobotics.
Attention: The username and password here are not the password you set when you set up. It is the authorized username and password given to you by Akınrobotics.
2- Make a Detailed Analysis for General Usage Information of Ar-Service Application. (For general usage information, see.)
A- Settings
Login to the AR-Service application with the username and password given to you by Akınrobotics.

Figure 1: User Login Screen
Examine the actions you will do in the settings button in the application.

Figure 2: Settings Entry Screen
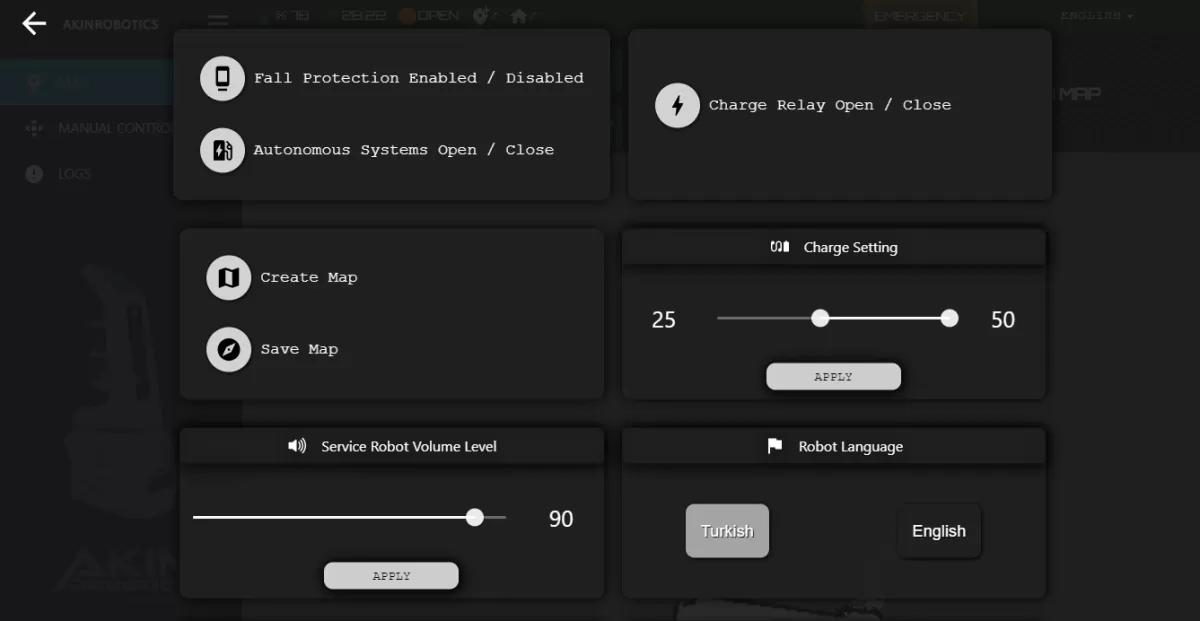
Figure 2-1: Settings Screen
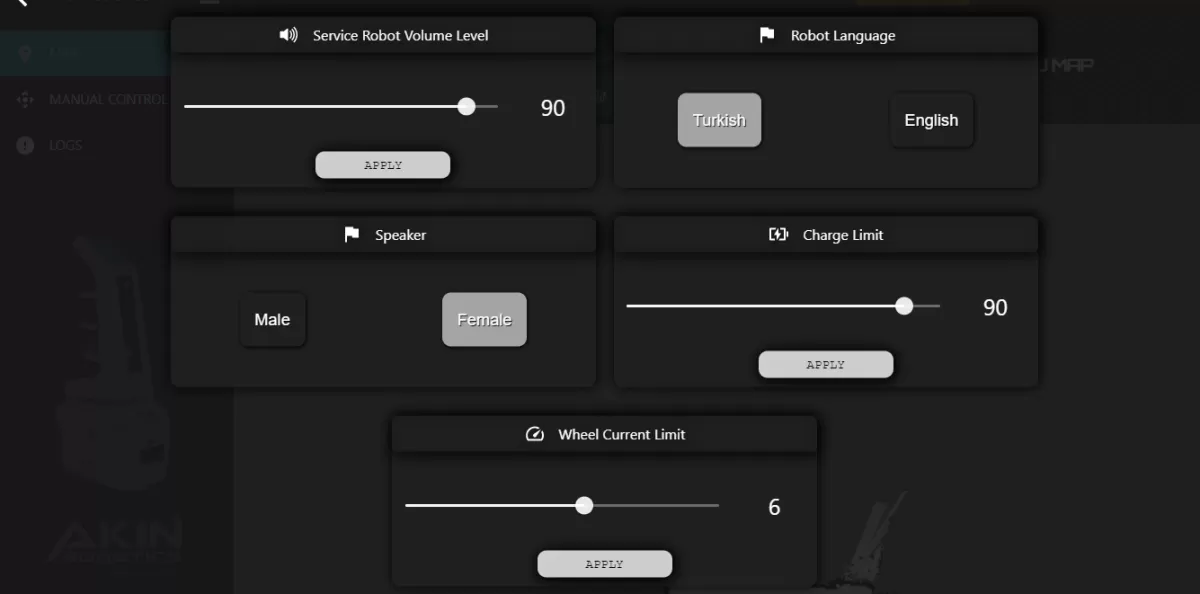
Figure 2-2: Settings Screen
Information: In this section, systems with blue button color are active.
Fall Protection Active / Disabled: This is the button where the fall protection sensors of your robot are set as active/disabled.
Caution: When this system is disabled, the robot will not sense any height
Autonomous Systems On / Off: It is the button that enables and disables the processes of going to the autonomous charging point of the robot and to the desired point when its trays are full.
Caution: This system must be disabled during the mapping process.
Attention: If autonomous systems are on, turn on your robot one meter away from the autonomous charging unit every time you turn it on.
Voice Notifications On / Off: This is the button where the alert notifications of your robot are turned on or off.
Charge Relay On / Off: It is the button that allows you to turn the charge relay on and off when you charge the robot manually.
Attention: If autonomous systems are on, you cannot manually take your robot to the charging station.
Create Map: This is the button where you will perform the new mapping process.
Save Map: This is the button that allows you to save the map you just created.
Charge Setting: It is the button where you set your robot to go to charge when the charge percentage falls below the percentage you set, and charge it up to the percentage you set.
Service Robot Volume: It is the button where the speaker volume of your robot is determined.
Robot Language: This is the button where you set the language of your robot's voice notifications.
Speaker: You can set your robot's voice notifications as female or male tones here.
Charge Limit: This is the button where you can set the charge limit percentage of your robot, which is fully charged, if it does not have a task.
Info: The Charge Limit will be activated when the robot has no task.
Wheel Flow Limit: This is the button where you can set the wheel flow limit on the floors where your robot has difficulty in moving forward.
B- Creating a Map
Bring your robot one meter in front of the autonomous charging unit and restart it.
Information: When your robot is turned on, it approaches the charging unit and activates the autonomous charging system and determines the area where it enters the charging unit as the starting position.
Press the settings icon. In the window that opens, click the 'Create Map' button. Confirm mapping on the screen that appears.

Figure 3: Settings Screen
After clicking the create map button, enter the manual control page and walk your robot around the area to be mapped. After this process, save the map by pressing the save button.
Information: Autonomous systems will turn off automatically when switching to the manual control page. After the mapping process is completed, bring your robot one meter in front of the autonomous charging unit and turn on the autonomous systems from the settings menu.
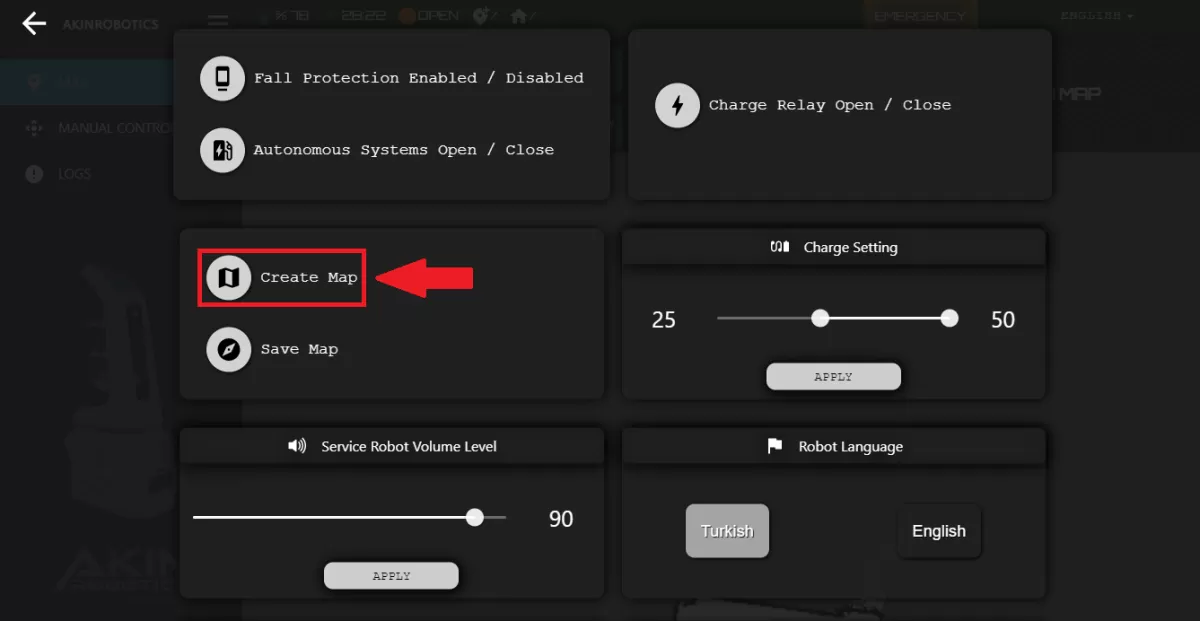
Figure 4: Create Map Screen
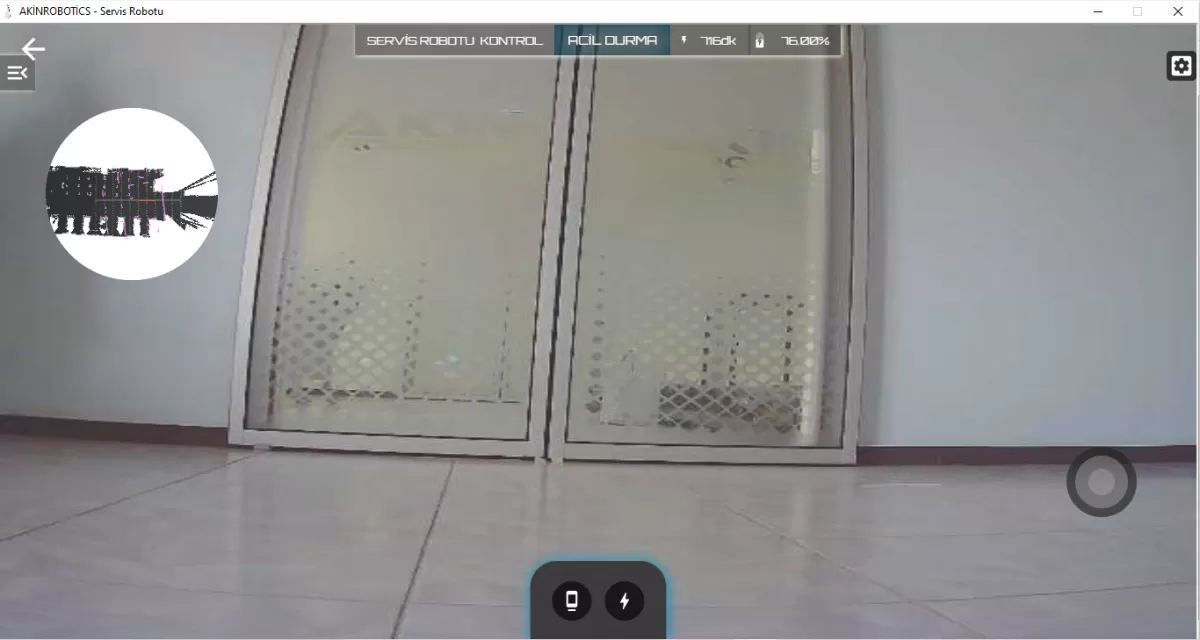
Figure 5: Open Camera Screen
C-Map Pointing
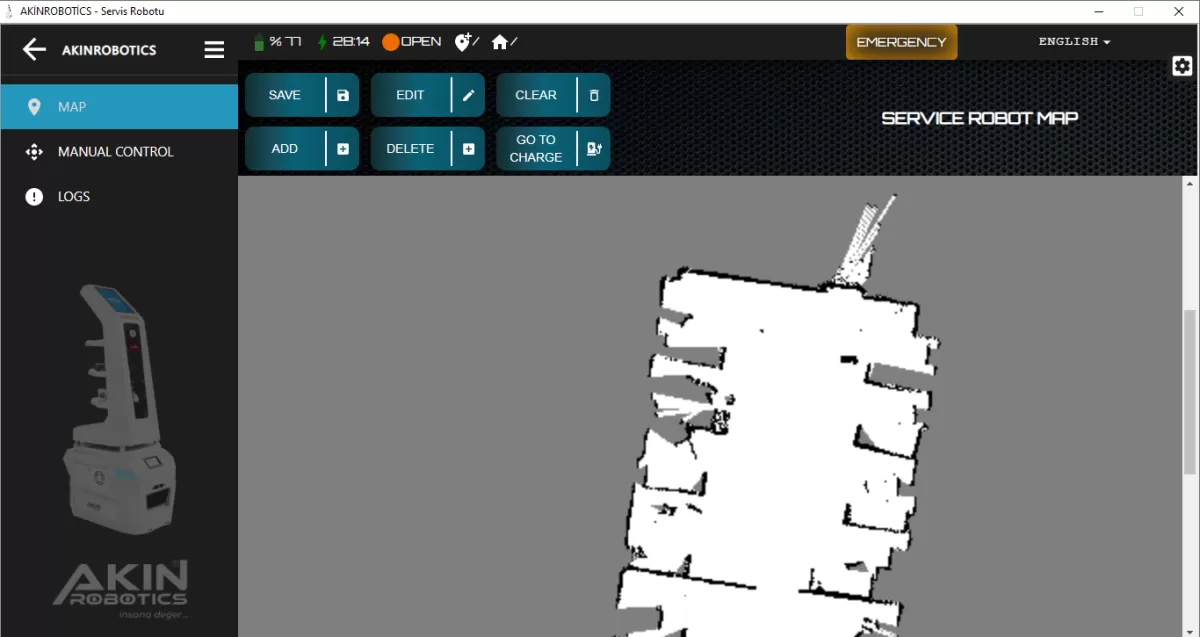
Figure 6: Map Modes Screen
Add:
Charging Point: It is the point where your robot will be charged.
Free Point: It is the point where you want your robot to go.
Attention: How the locations are named in your QR Menu, the naming of the points here should be the same.
Save: This is the button to save every point we have added.
Attention: Do not forget to save the map after saving all the points on your map.
Edit: This is the button for editing the positions of the 'Charging Point' and 'Free Points' created.
Attention: Do not forget to save the map after editing.
Go to Charge: This is the button that allows your robot to cancel and go to the charging point while it is on duty.
Delete: It is the button to delete the created 'Charging Point' and 'Free Points' positions.
Caution: Do not forget to save the map after deletion.
Clear: This is the button to permanently delete the created 'Charging Point' and 'Free Points' locations.
D-Notifications
Logs: This is the section where all operating system records are displayed.
Information: In this section, you can see all reports about whether your robot has been to charging and locations, whether the correct trays have been received, by selecting a date range.