
1- You can reach the map you created by following the steps of Ar-Designer > Design > Navigation > UV-C Map Manager. (Click to design creation)
Step-1: Click the “Create New Design” button under the “File” name.
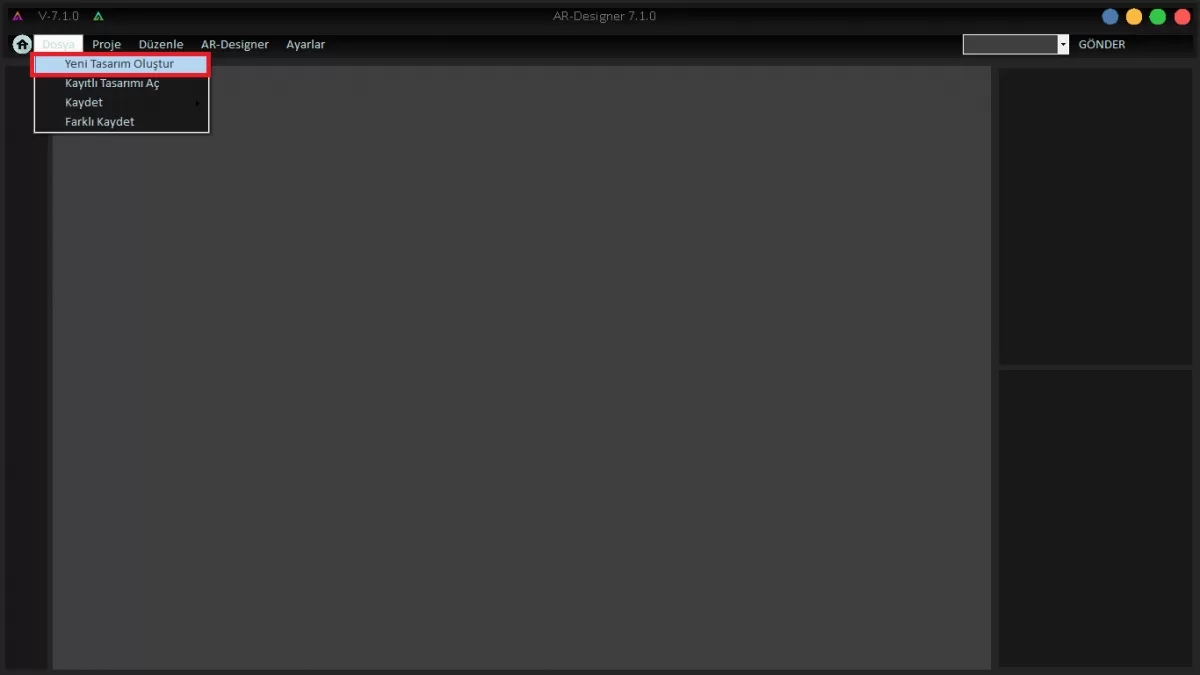 IMAGE C-1: CREATE NEW DESIGN
Step-2: After naming the newly created design, click on the created project to enter it.
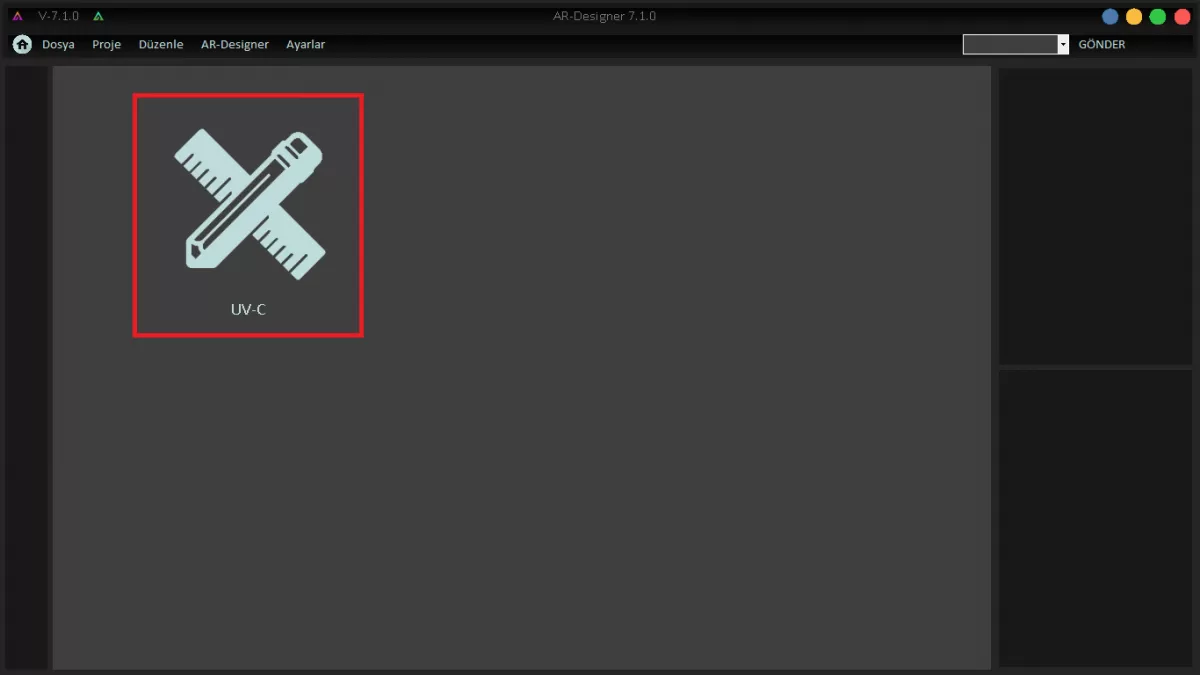 IMAGE C-2: ENTERING THE PROJECT
Step-3: Click the “Navigation” button.
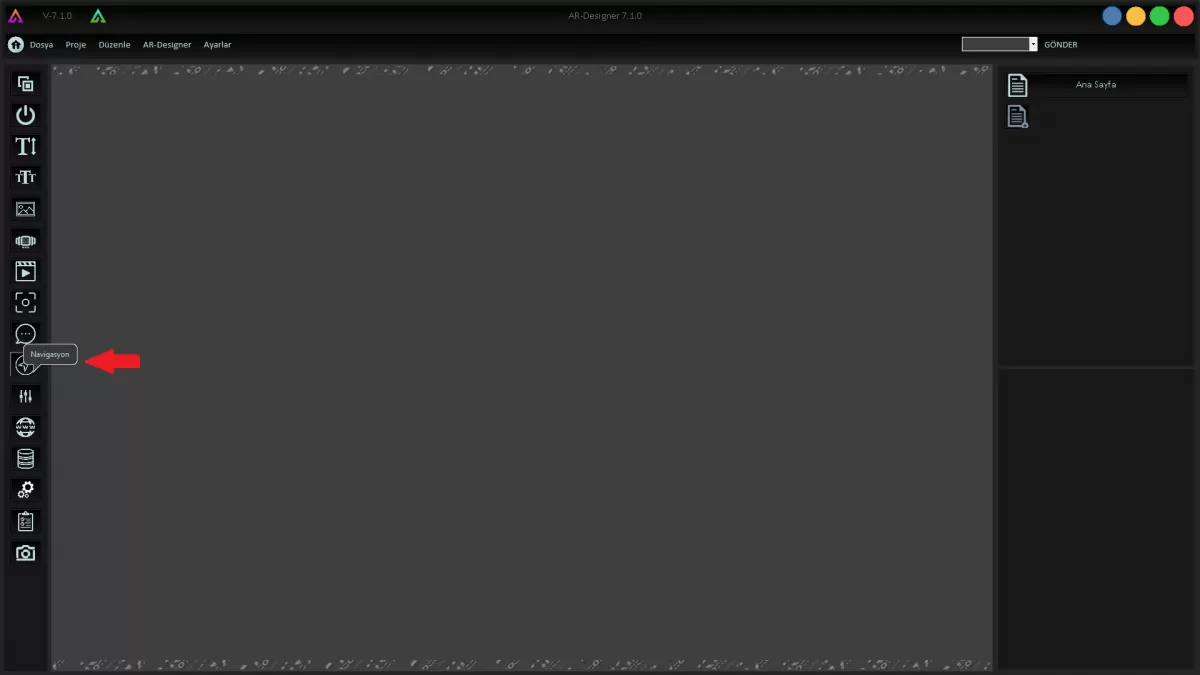 IMAGE C-3: NAVIGATION
Step-4: Click the “UV-C Map Manager” button
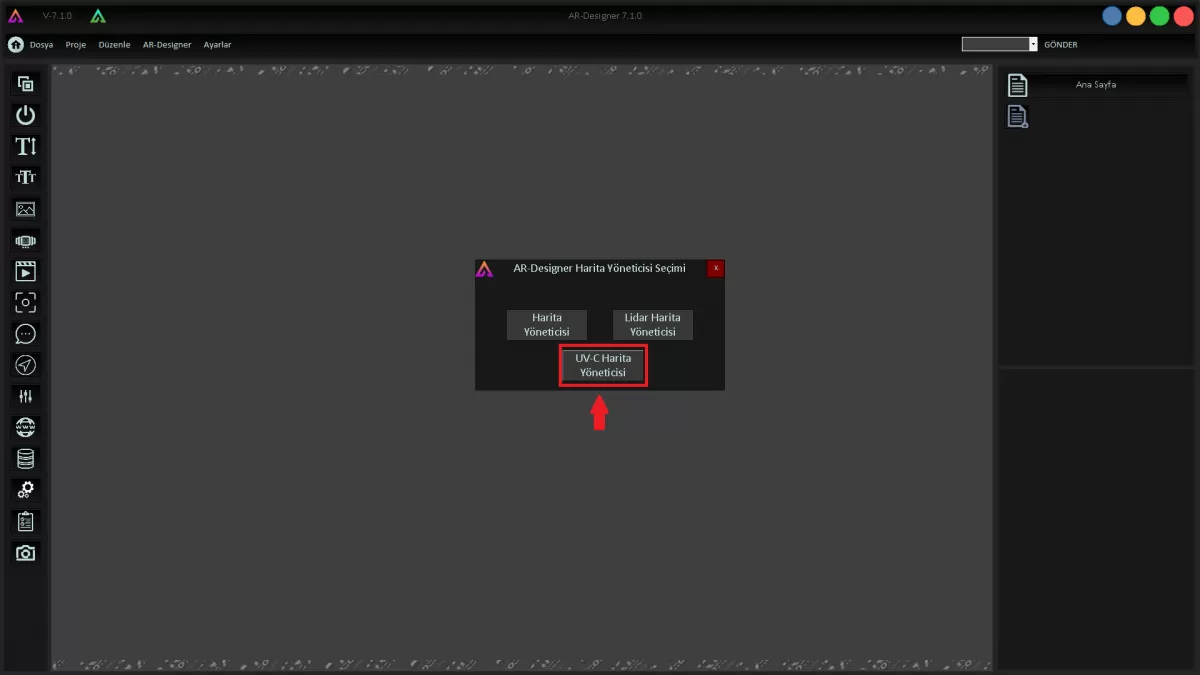 IMAGE C-4: UV-C Map Manager
Step-5: Click on the IP address of your robot under the name of “Select Robot”. If your robot's IP address is not visible, you can enter it manually. Step-6: Click the “ADD NEW MAP” button.
Step-6: Click the “ADD NEW MAP” button.
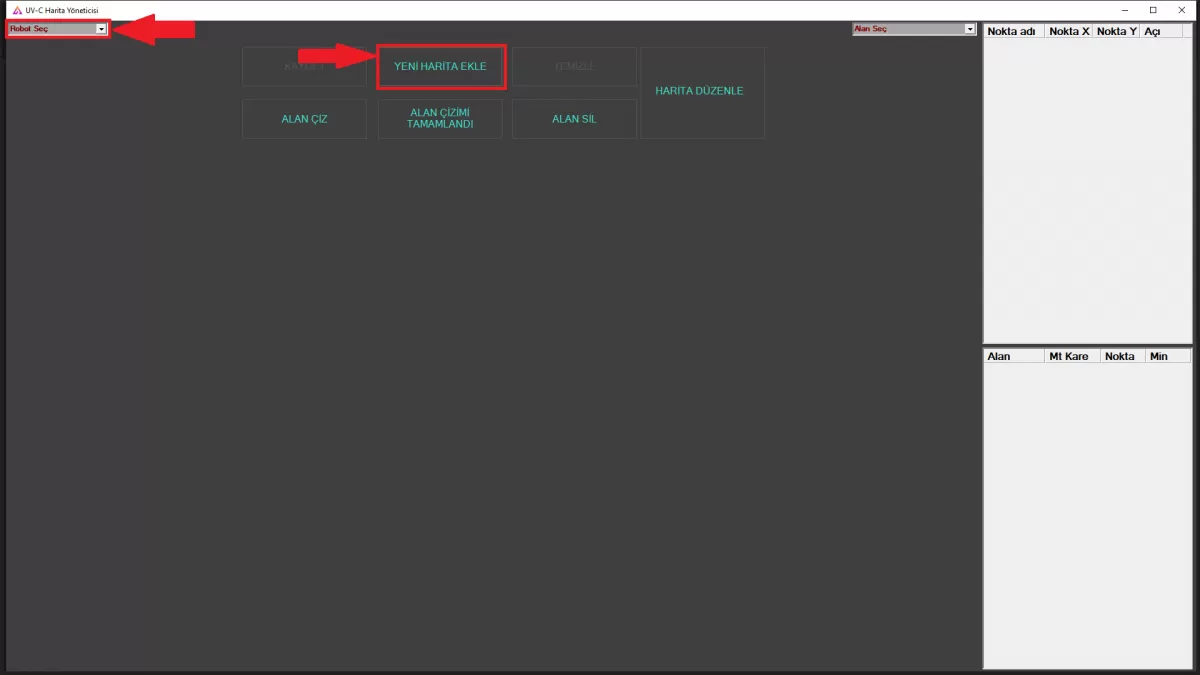 IMAGE C-5: Add a New Map
WARNING! While performing these operations, make sure that your robot and computer are on the same network.
2- Create an field for the locations where the sterilization process will take place. (click to see field creation)
Step-1: Click the "DRAW FIELD" button.
Step-2: After completing the area drawing with the mouse, click on the "FIELD DRAWING COMPLETED" button. (You can see the created areas on the right side of the interface).
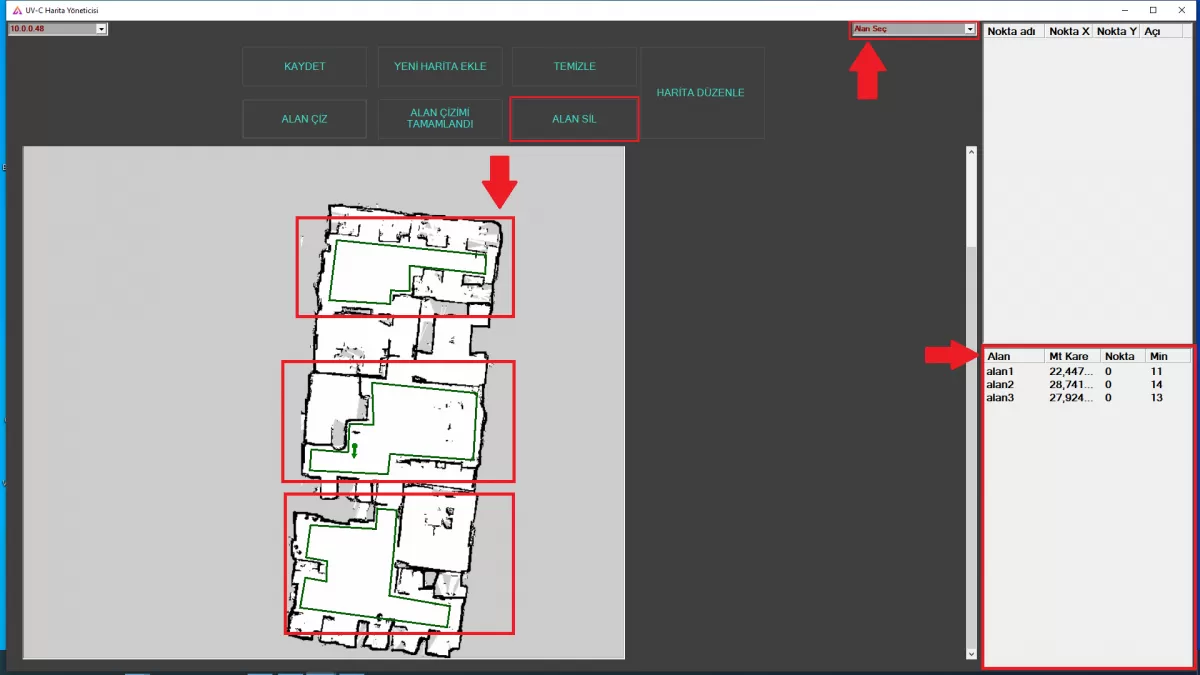 IMAGE D-1: Draw Field Screen
NOTE: You can see the fields you have created in the "Field" section at the bottom right of the screen.
Step-3: In order for the robot to perform the sterilization process, you must first determine a "Start Position". To do this, click on the “Give Start Position” button. Give its position with the mouse.
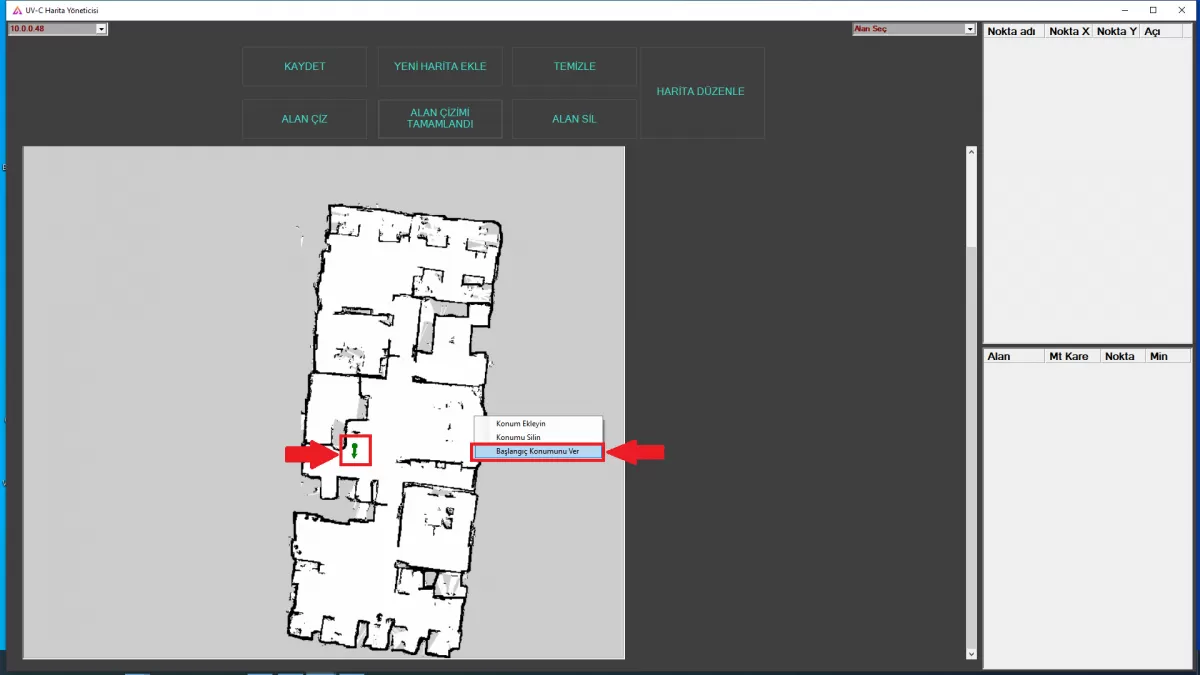 IMAGE D-2: Determining the Start Position
Step-4: Click the “Add Location” button to add a location inside the drawn field(s). (You can see the minimum number of points you need to add to ensure full sterilization in the field).
 IMAGE D-3: Adding a Position
WARNING! Make sure that the points you have determined are not close to each other and to the field lines.
WARNING! Do not forget that your robot will perform the sterilization process by taking into account the order of points you have determined.
Step-5: After specifying the points, click the “SAVE” button. (You can see the created points on the right).

IMAGE D-4: Save Map
WARNING! To delete the points you have created, right click on the point with the mouse and use the "Delete Position" option.
IMAGE D-5:Edit Field
NOTE: To delete the field(s) you have created, click on the field you want to delete from the field names under "Select Field" and use the "DELETE FIELD" button. You can use the "CLEAR" button to completely clean the inside of the map.
Step-6: After completing the mapping and adding location, we save our map by clicking the "SAVE" button.
3- Use the Draw Field button to create a field.
4- Determine the minimum point required for the complete sterilization of the created fields.
5- After drawing the field and determining the point, determine the starting position of the robot. The starting position should be 1 meter from the charging station.
6- After performing the necessary operations, select the active robot, save it, and close the AR-Designer program.