
1-Do a detailed examination of the installation information you need to do when your robot is first turned on. (Click to see setup information.)
Turn on your mini ADA robot as specified in the robot boot instructions. When your robot is turned on and ready for use, start your work by following the steps given below.
After Mini ADA Robot is turned on, before working on Ar-GUI and Ar-DESIGNER programs, enter the interface section by pressing the button indicated in Image 1 on the front screen of your robot so that you can see the Password and IP numbers that will be required to connect the robot with these programs.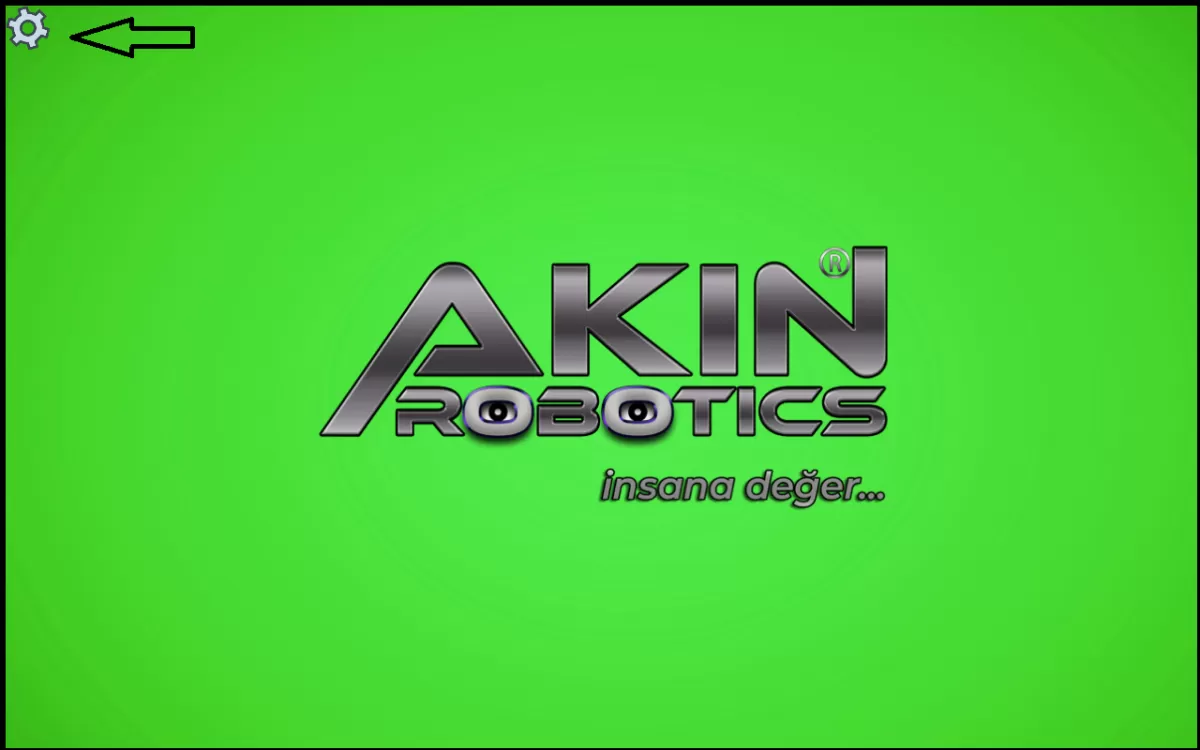
Image 1: Logın the robot ınterface
After pressing the Settings button, log in to the page indicated in Image 2 with your Username and Password given to you by AKINROBOTICS.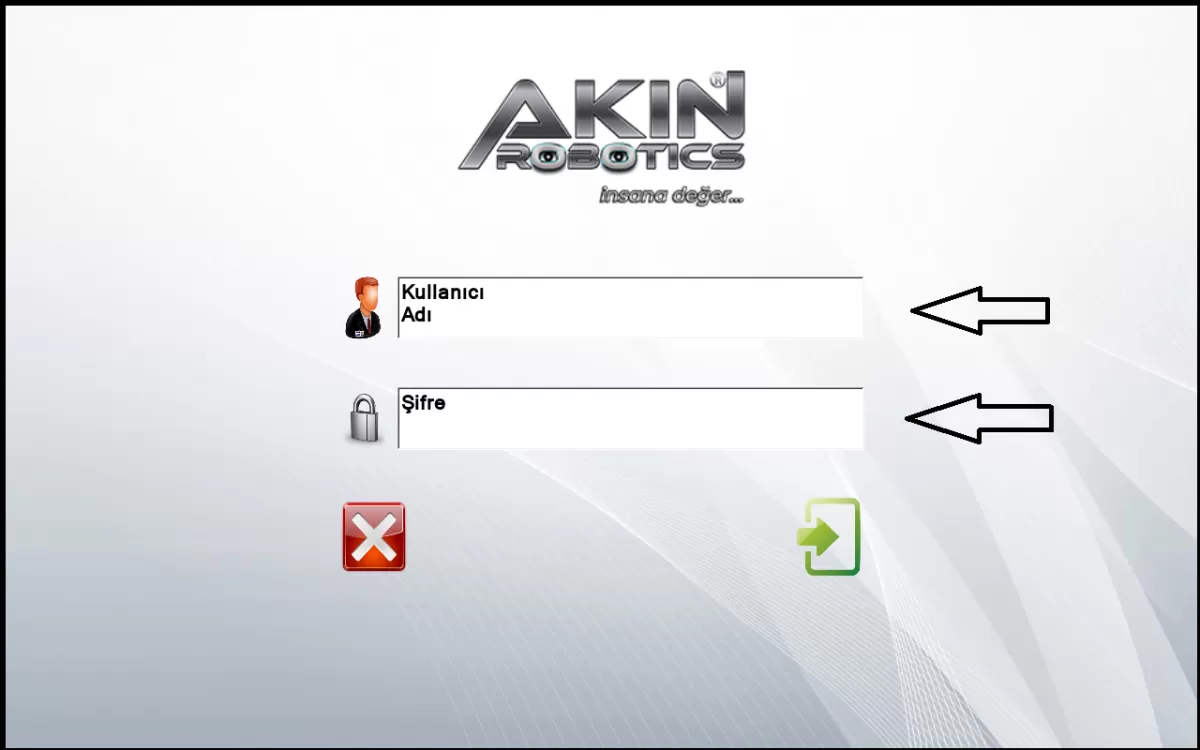
Image 2: Login by typing the Interface Username and Password
Connect your robot to the internet network that your computer is connected to by pressing the part indicated in Image 3.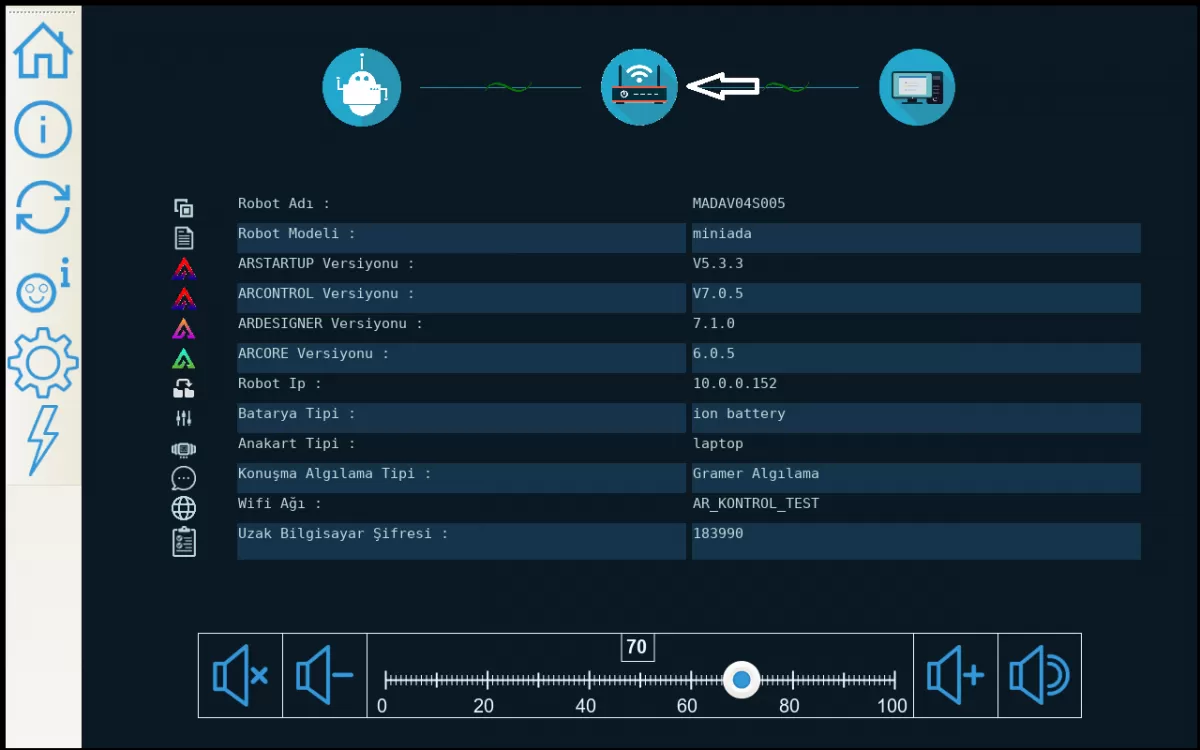
Image 3: Internet Network Connection
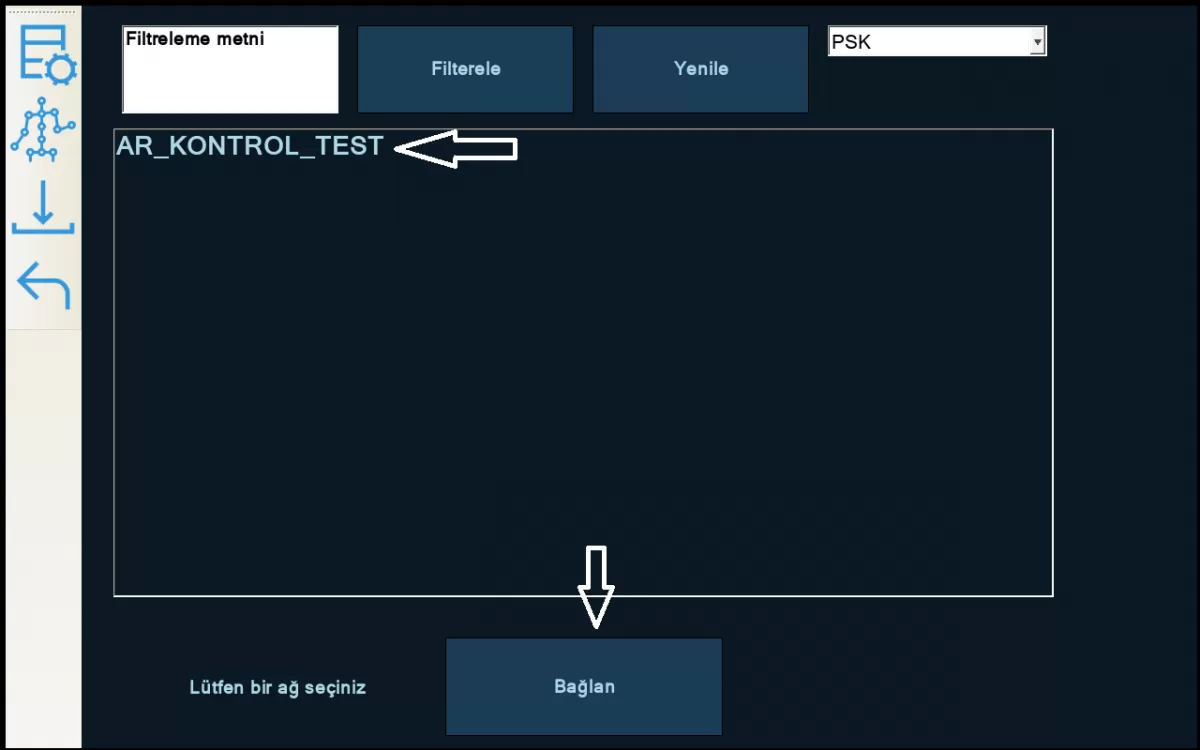
Image 3-1: Internet Network Connection
After completing your internet connection, the 'Remote Computer Password' marked in Image 4 is the password you will use when logging into the Ar-GUI program. This password is renewed every 24 hours. The other marked 'Robot Ip' number is the IP number that will be required to upload the designs you have made in the Ar-DESIGNER program to the front screen of the Mini ADA robot.
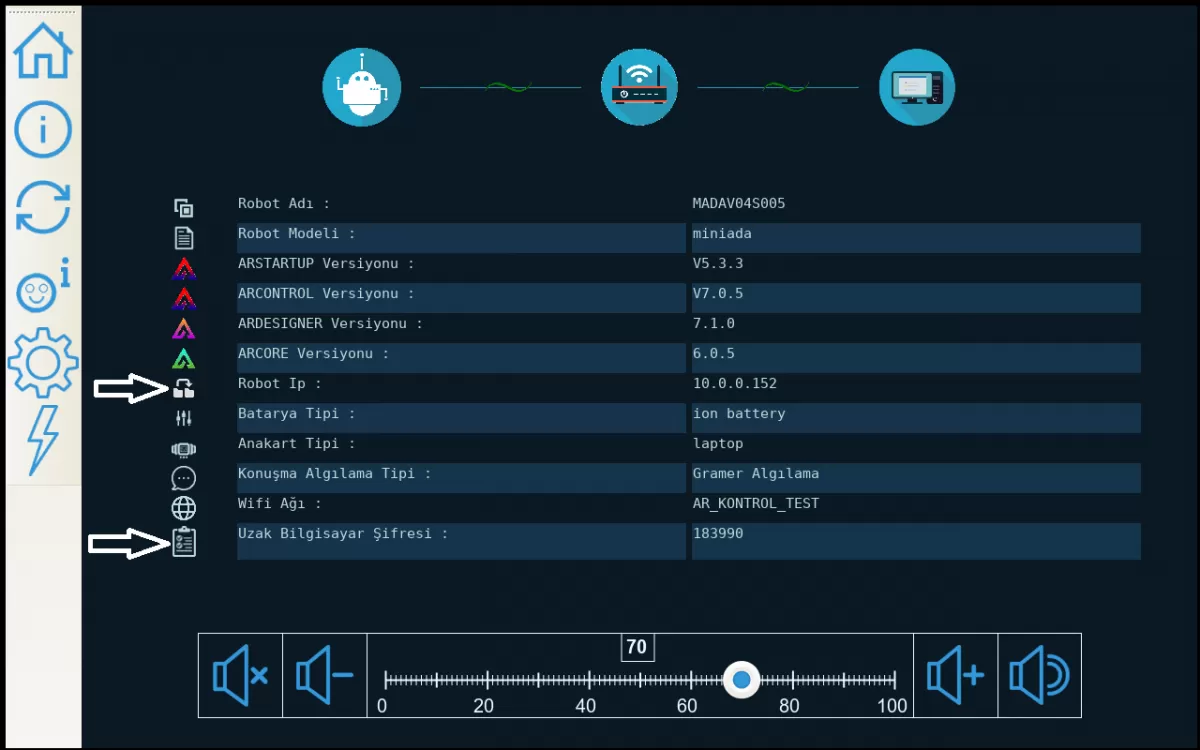
Figure 4: Robot IP Number and Remote Computer Password
2- You can see the information about the updates of your robot by following the steps given in the link. (Click to see the Update Screen information)
Check if there is a new software update on your robot by following the steps in Image 1. Please update the parts with new updates by checking your internet connection.
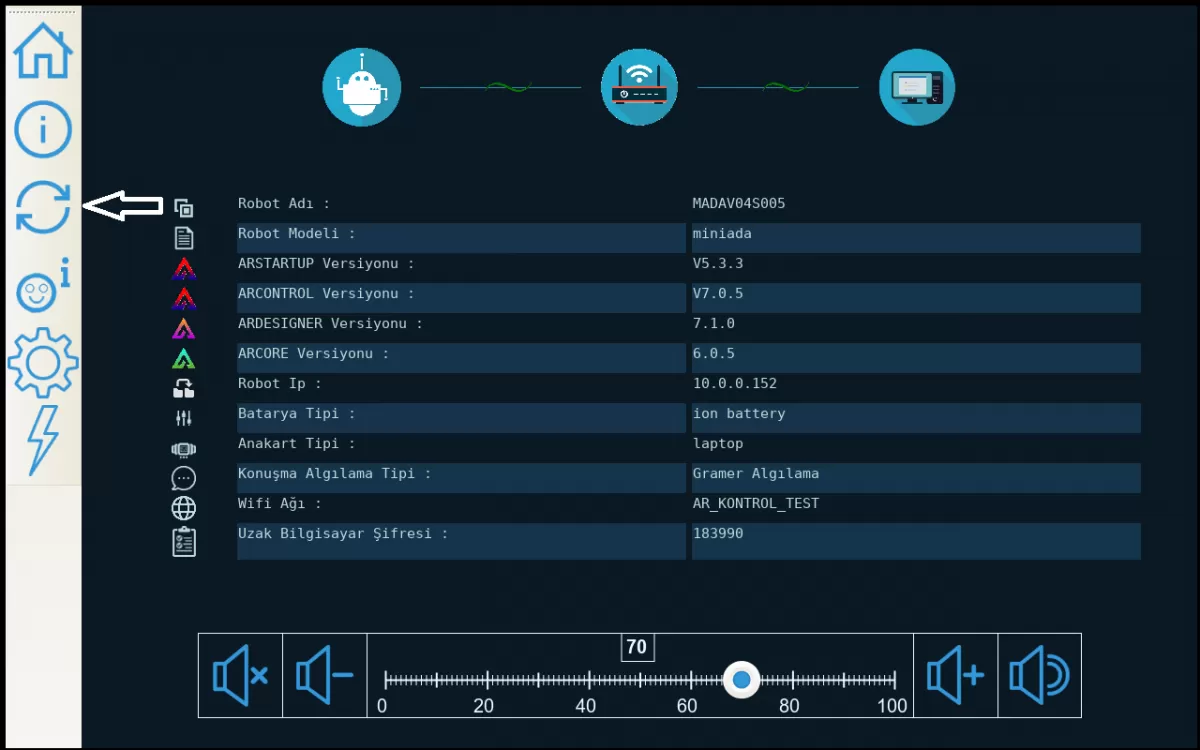
Image 1: Robot Software Download Screen
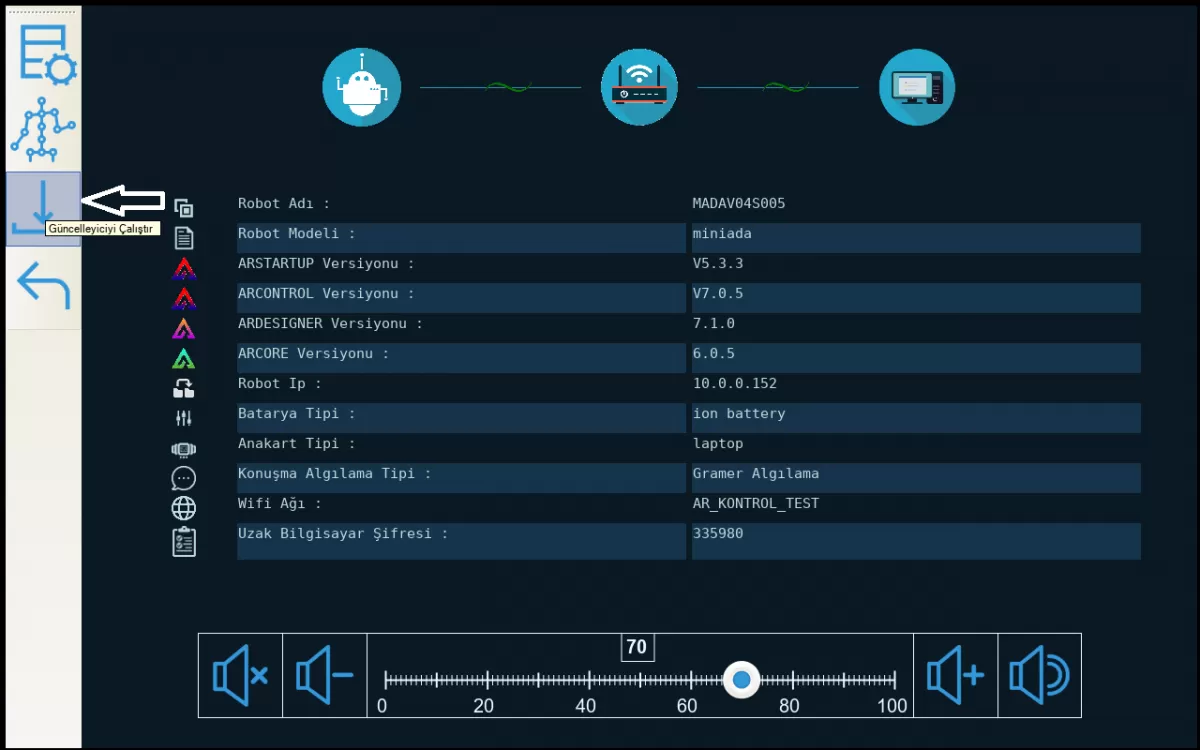
Image 1-1: Robot Software Download Screen
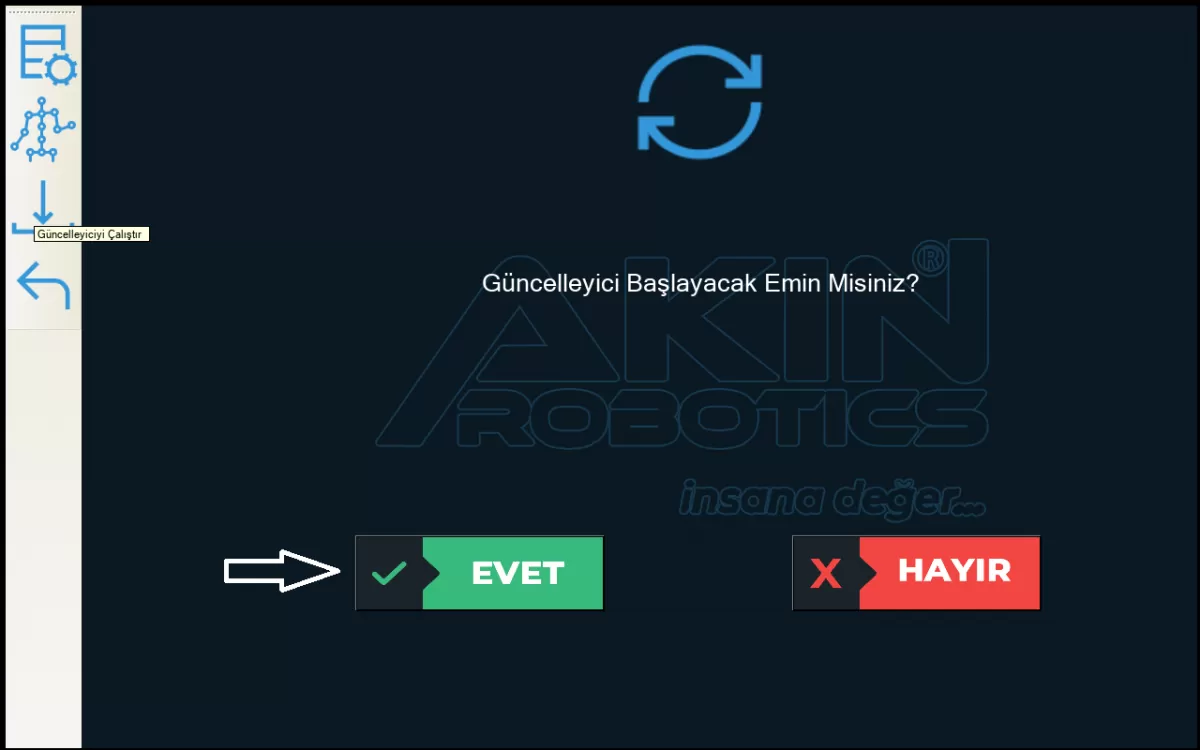
Image 1-2: Robot Software Download Screen
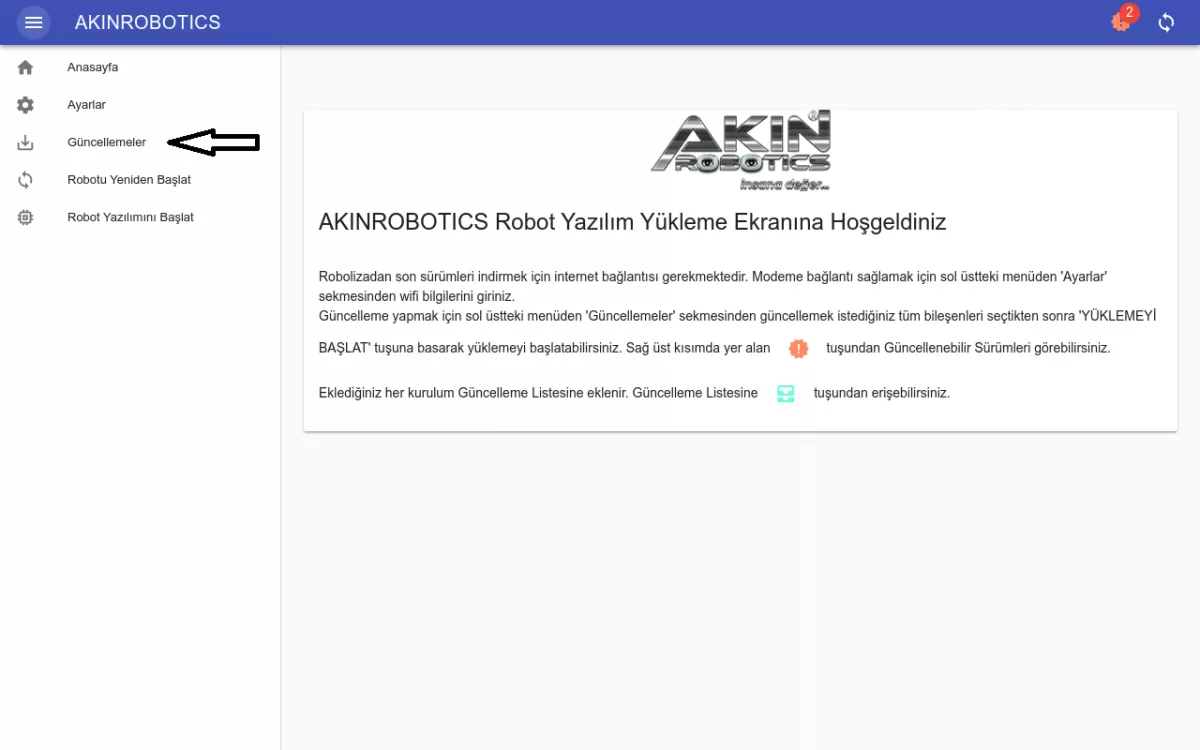
Image 1-3: Robot Software Download Screen
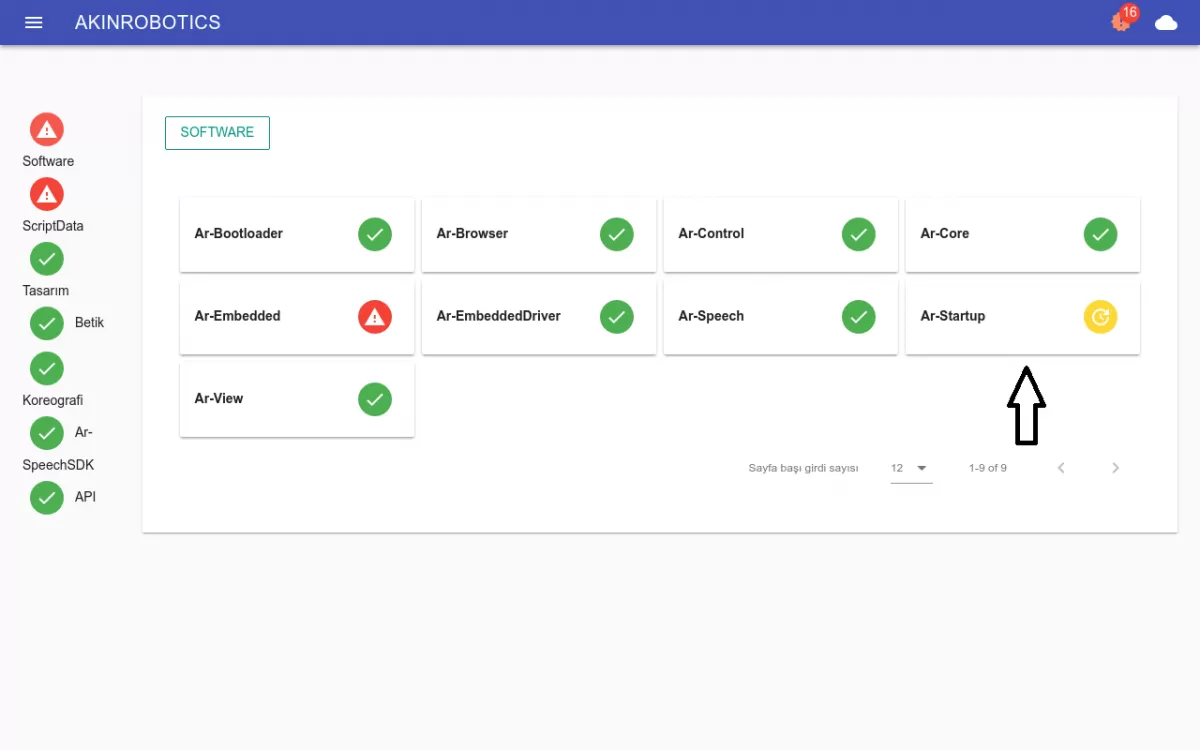
Image 1-4: Robot Software Download Screen
Before starting the update process, check whether the Mini ADA has an internet connection by pressing the settings button in the updater screen as indicated in Image 1-5. If your connection is broken, connect Mini ADA to the internet network your computer is connected to.
Image 1-5: Robot Software Installation and Internet Network Connection Screen
If you have made your internet network connection again, you need to restart the robot software by pressing the button indicated in Image 1-6.
Image 1-6: Robot Software Running Screen
3- You can see the current versions of your robot and the information screens in case of any malfunction that may occur by following the steps given in the link. (click to see Control Information Screen)
Check the robot error messages section in the robot control information screen by following the steps in Image 1, and if there is an error message, report the image of this screen to AKINROBOTICS without intervening. Then follow the steps specified by the customer representative assigned to you by AKINROBOTICS.
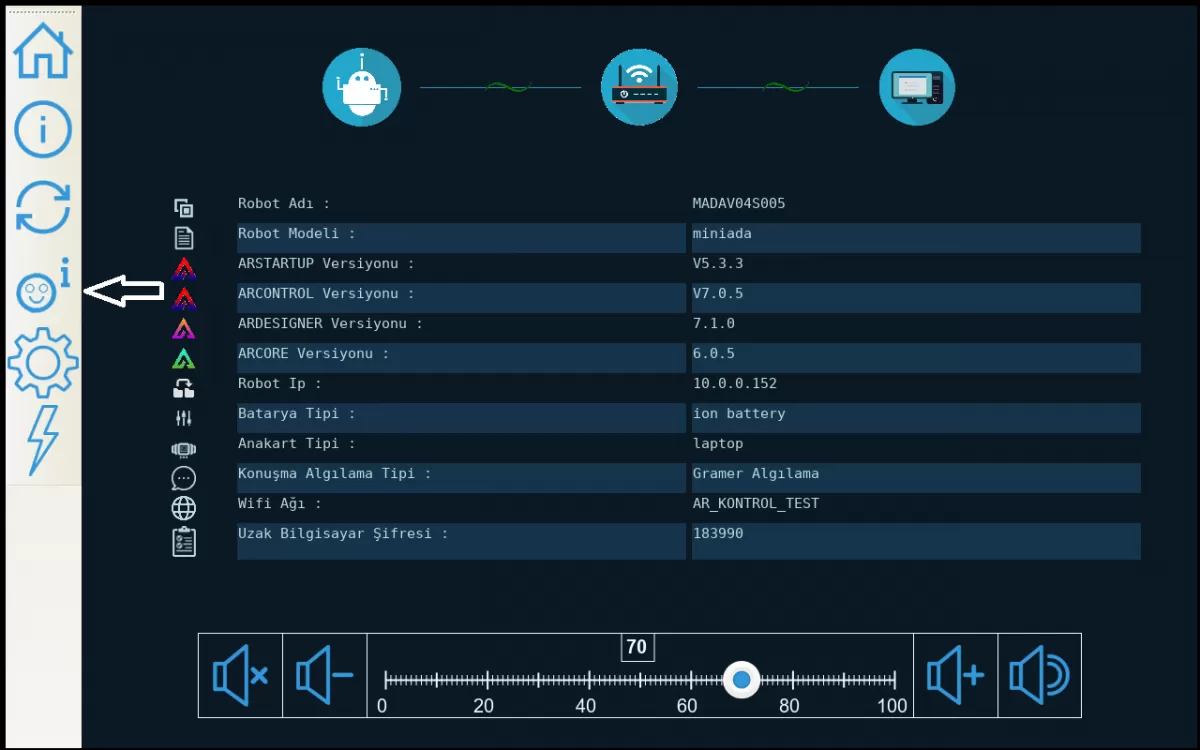
Image 1: Robot Control Information Screen
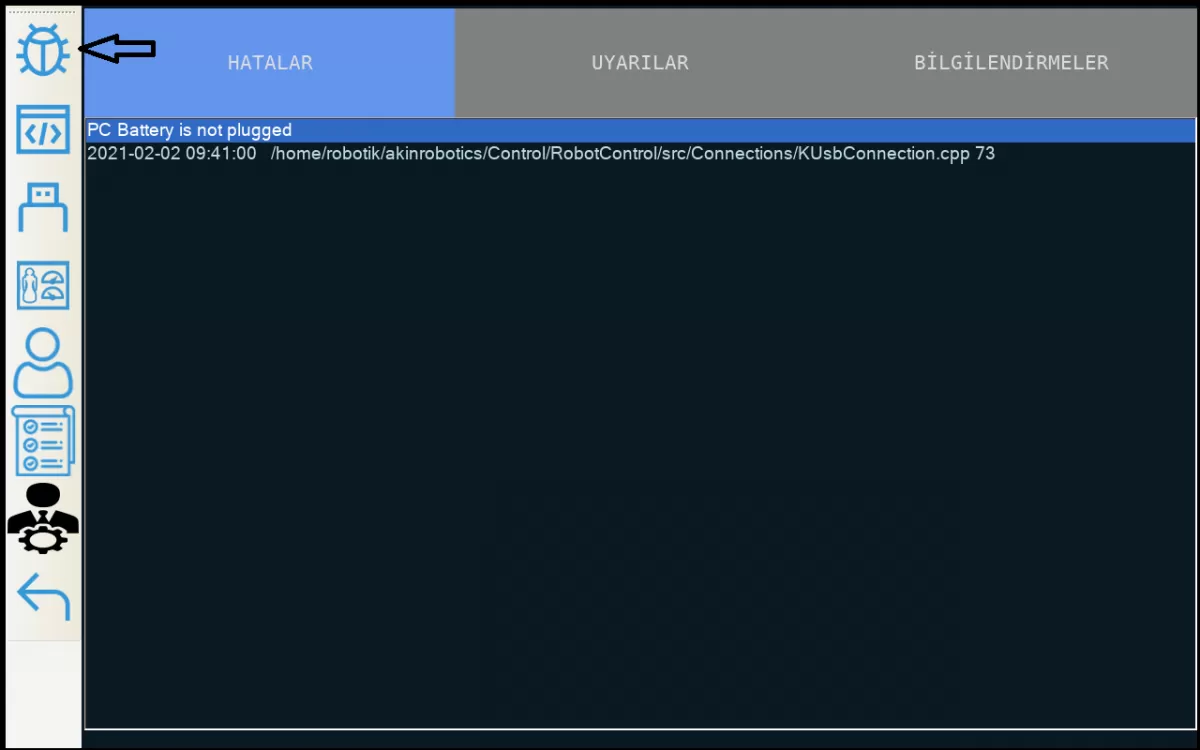
Image 1-1: Robot Error Messages Screen

Image 1-2: Robot Error Messages Screen
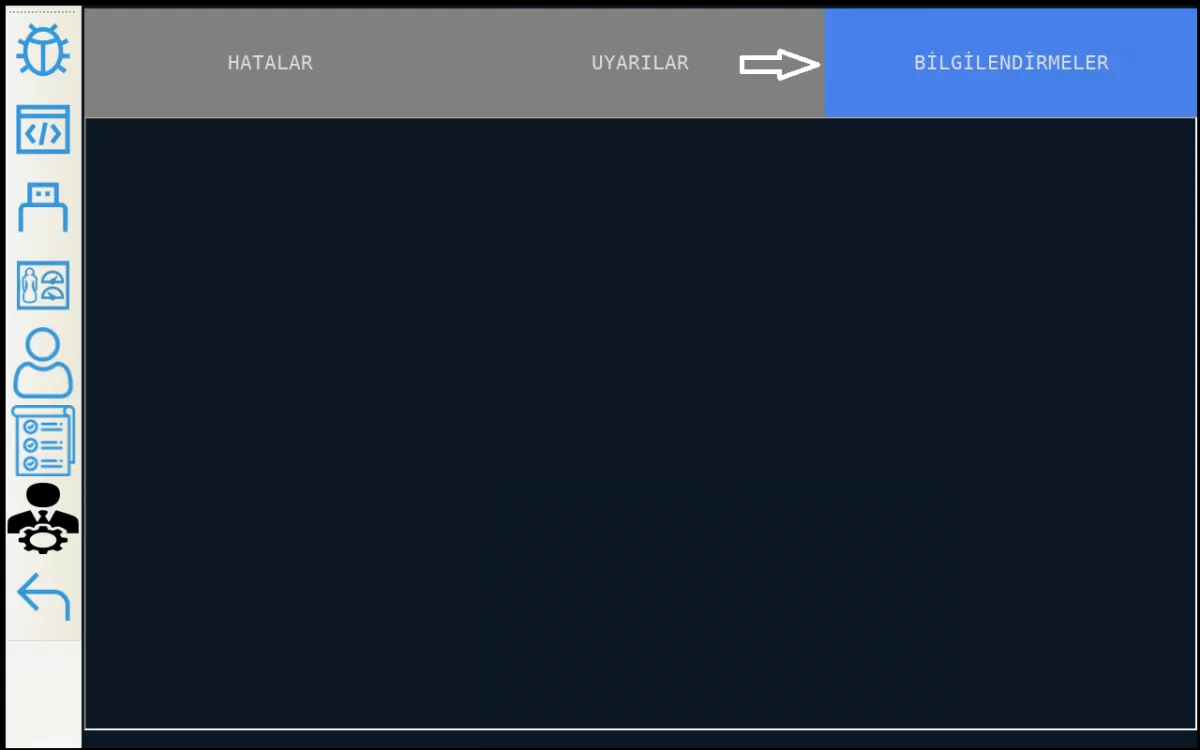
Image 1-3: Robot Error Messages Screen
You can check the robot software versions in the control information screen of your robot by following the steps indicated in Image 2. If you are using old version software, go to the update menu and complete your software updates.
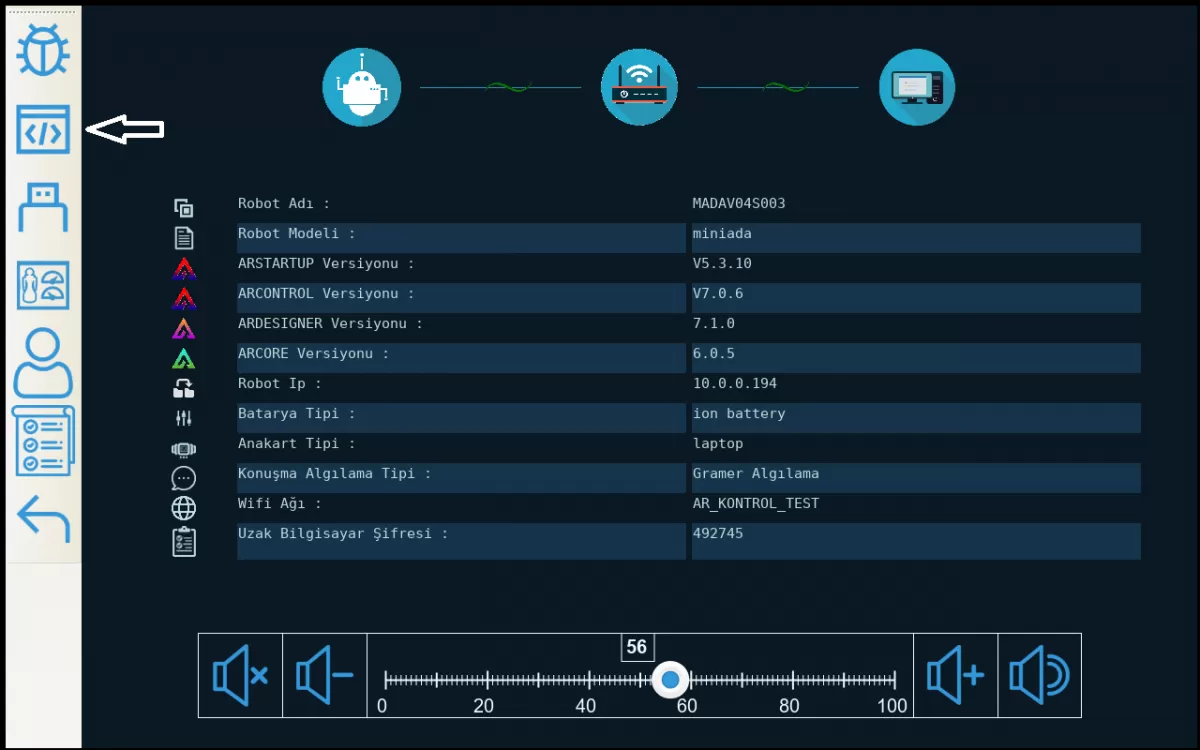
Image 2: Robot Software Versions Screen
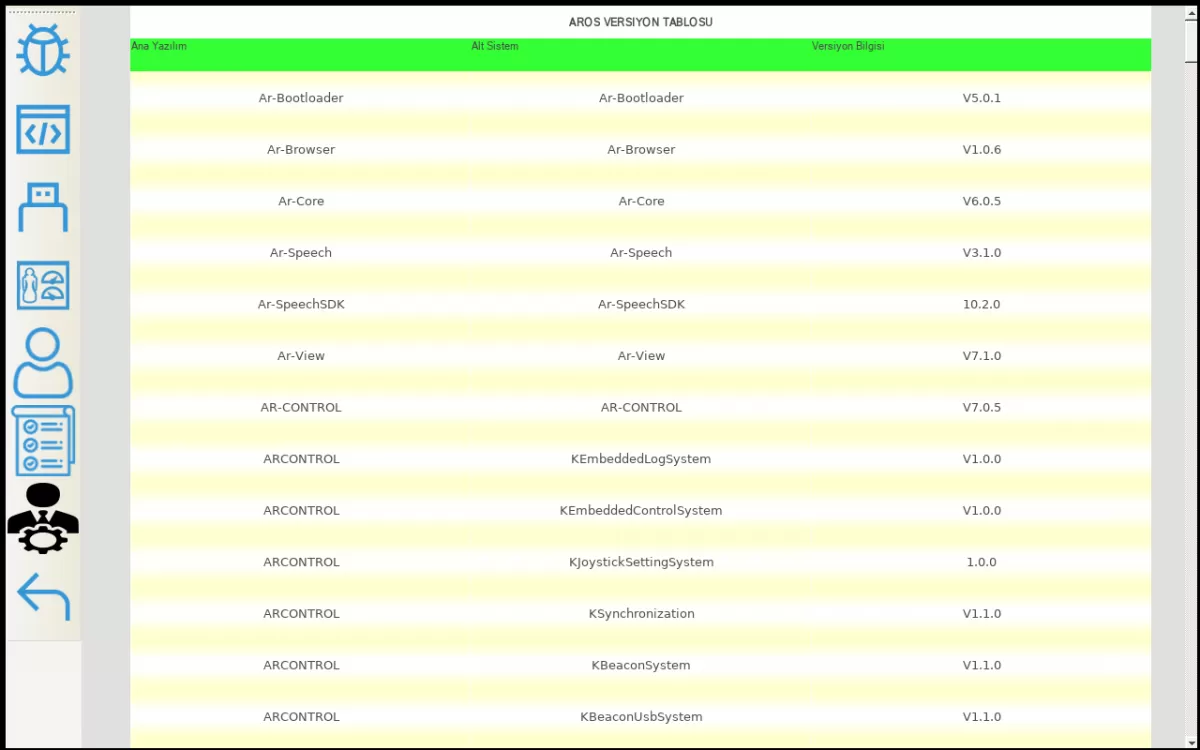
Image 2-1: Robot Software Versions Screen
You can check the USB information in your robot's control information screen by following the steps indicated in Image 3. For the parts of your USB information that you cannot use, click on the screen and set it to "Allow".
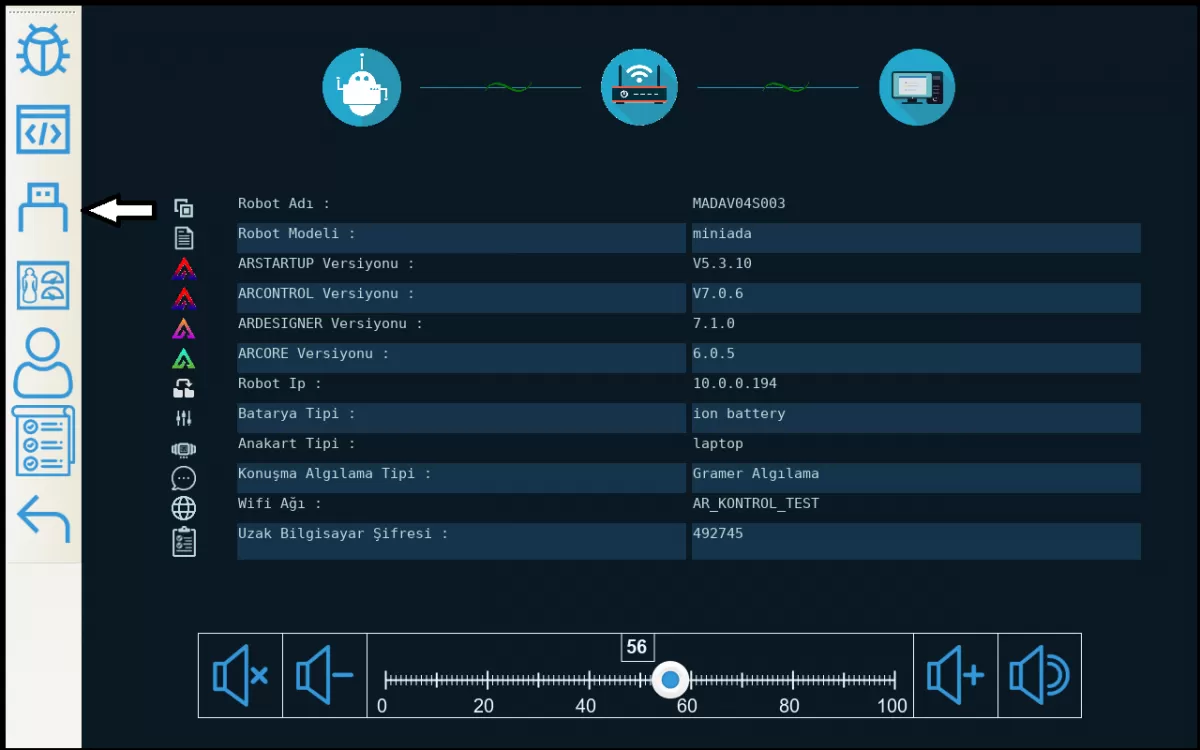
Image 3: Robot USB Information Screen
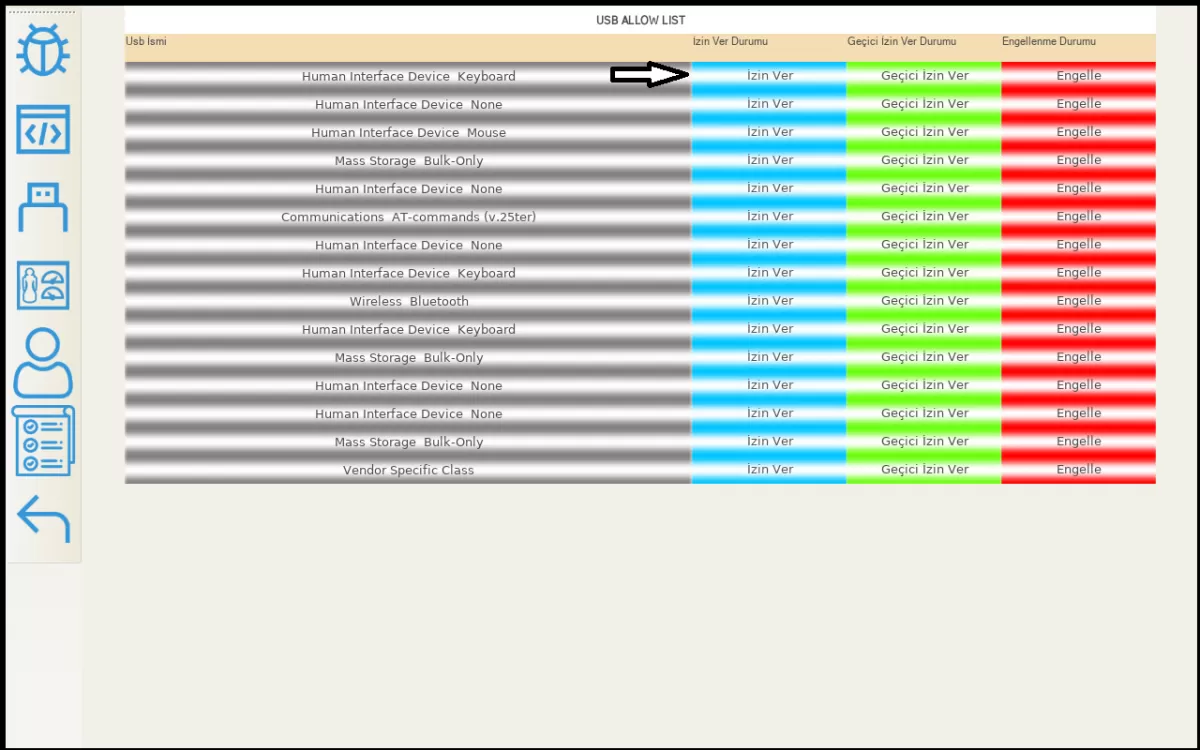
Image 3-1: Robot USB Information Screen
By following the steps specified in Image 4, you can see your robot's statistics and errors, graphics, and current values from the robot test menu on your robot's control information screen. You can test your robot by pressing the test and detailed test buttons. If you encounter any problem during the robot test process, do not intervene yourself and contact AKINROBOTICS immediately. Then follow the steps specified by the customer representative assigned to you by AKINROBOTICS.
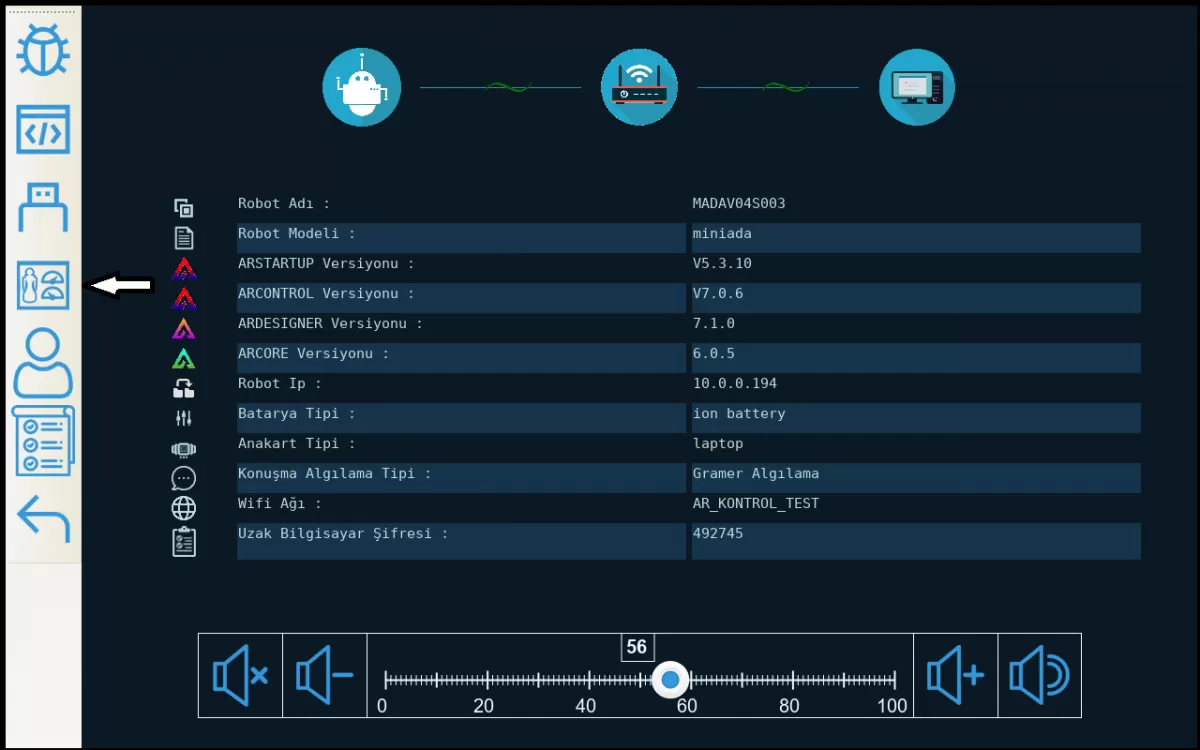
Image 4: Robot Test Screen
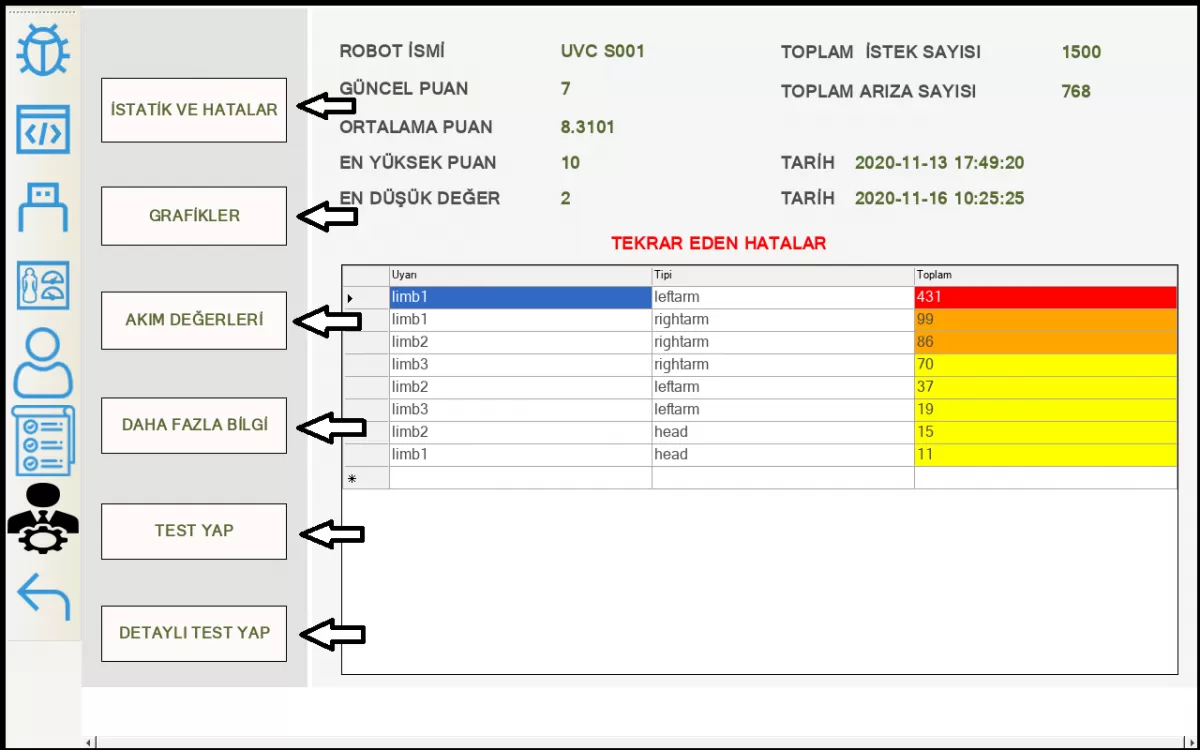
Image 4-1: Robot Test Screen
By following the steps in Image 5, you can switch between the characters you have made before on the Ar-GUI by pressing the character button on the control information screen of your robot, and you can choose according to your own organization. You cannot select two different characters at the same time.
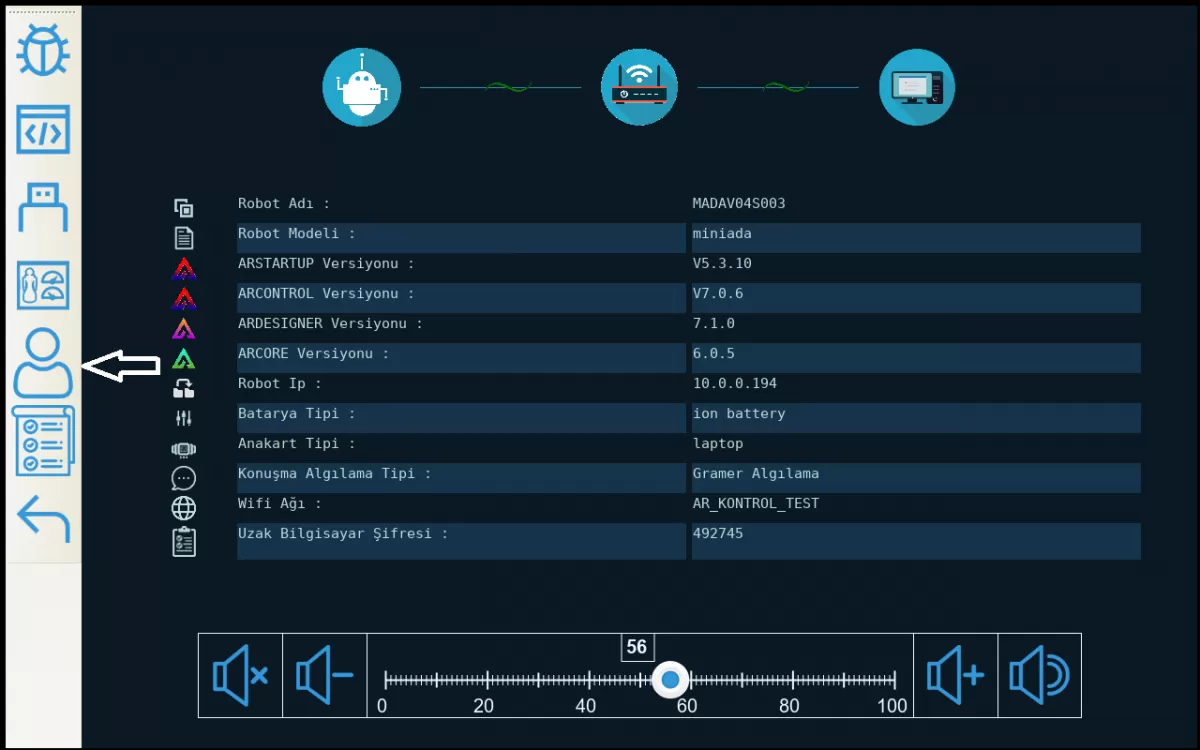
Image 5: Robot Character Identification Screen
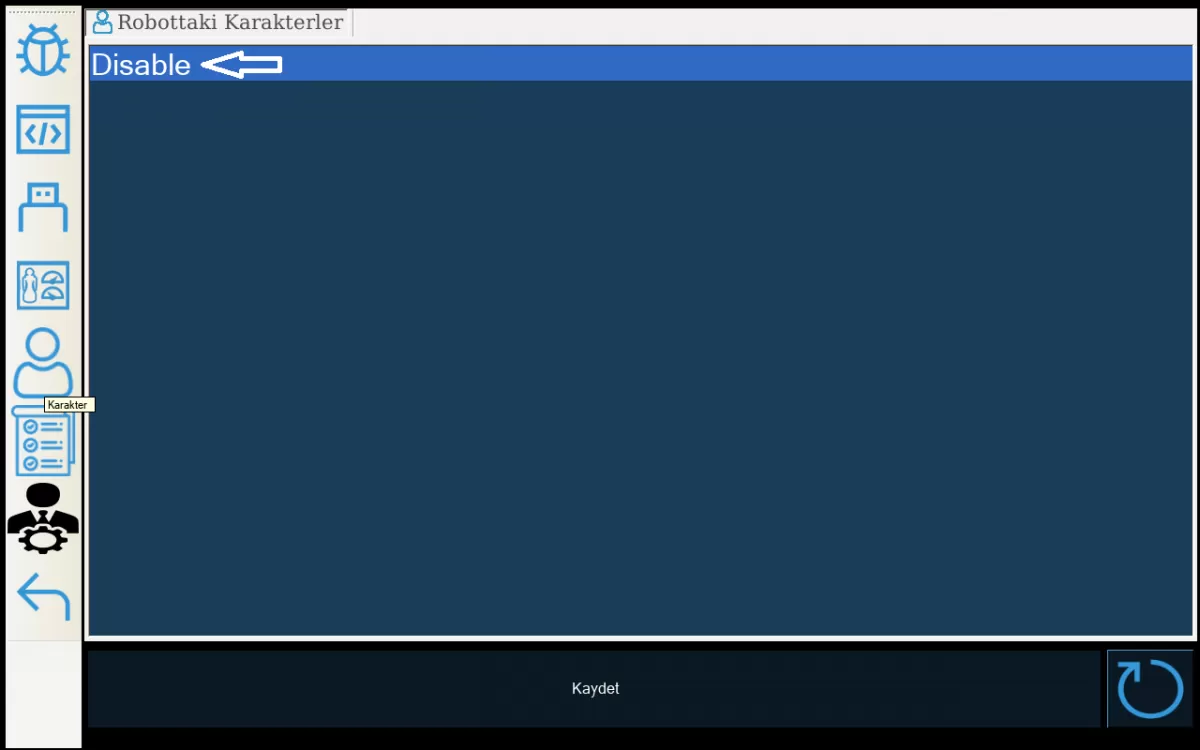
Image 5-1: Robot Character Identification Screen
By following the steps in Image 6, you can switch between the robot tasks you have done on Ar-DESIGNER and choose according to your own organization by pressing the task button on your robot's control information screen. You cannot select two different tasks at the same time.
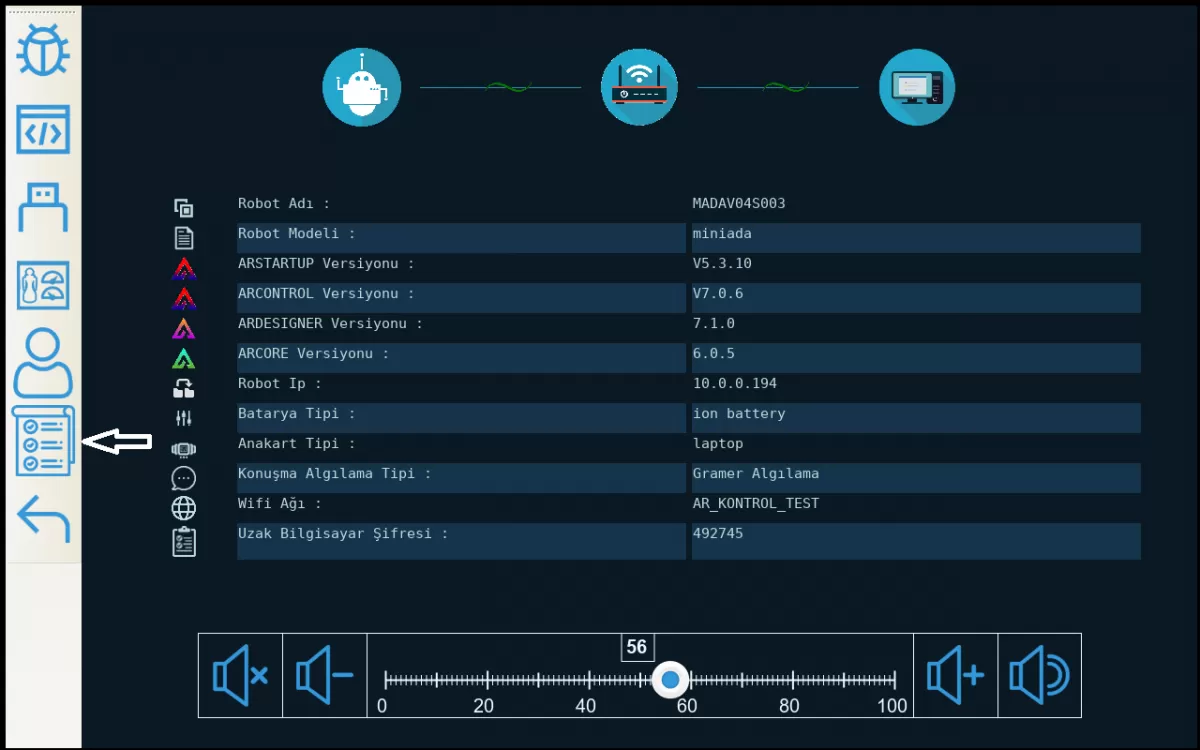
Image 6: Robot Mission Screen
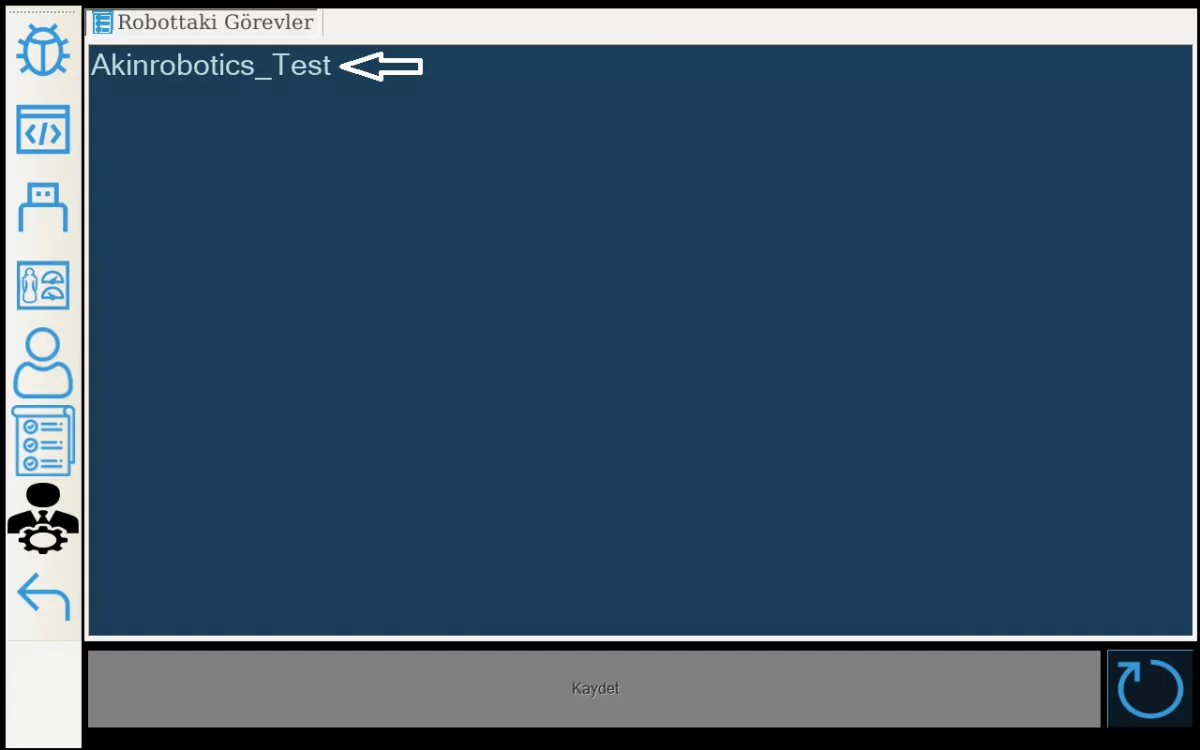
Image 6-1: Robot Mission Screen
You can see the list of people you have previously registered with the Ar-GUI interface program by clicking the people you know button on the control information screen of your robot by following the steps indicated in Image 7.,

Image 7: Robot Recognizes Humans Screen
4- You can see the information about the front screen settings of your robot by following the steps given in the link. (click to see the Options Screen)
You can optionally remove the settings button on the top left of the front screen of your robot with the actions indicated in Image 1. With this process, you will prevent those who try to log in from the front screen to the interface part other than you.
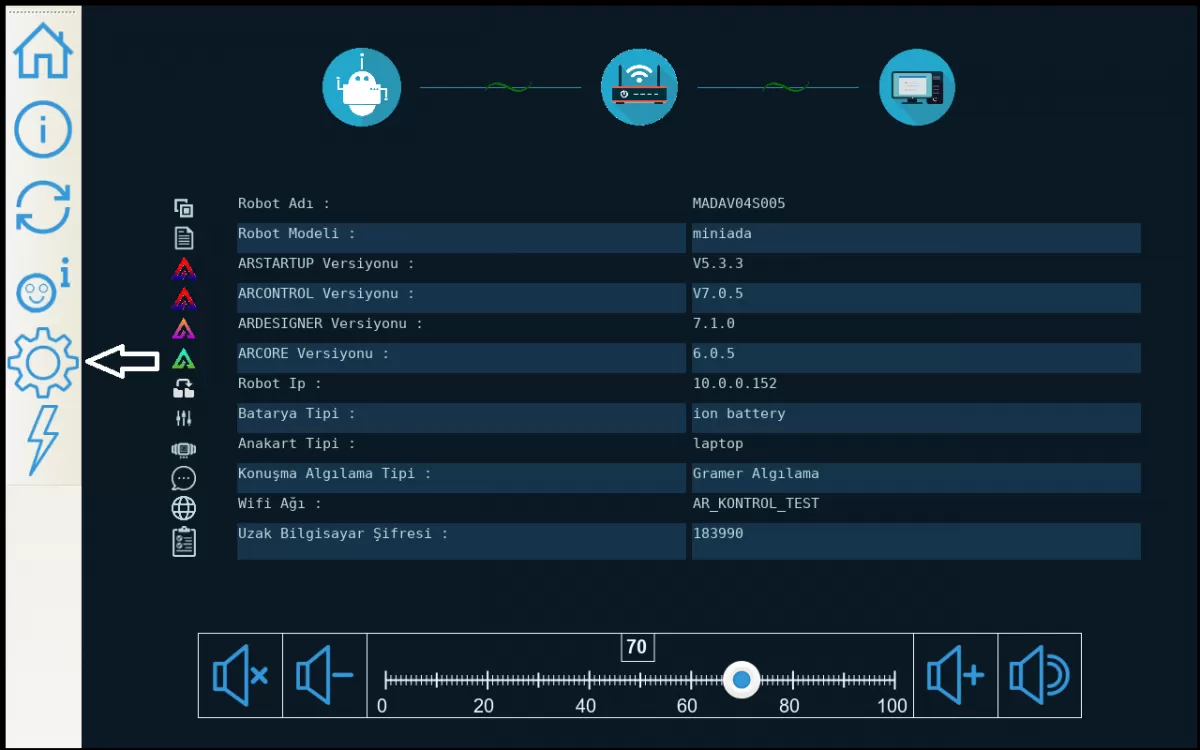
Image 1: Robot Options Screen
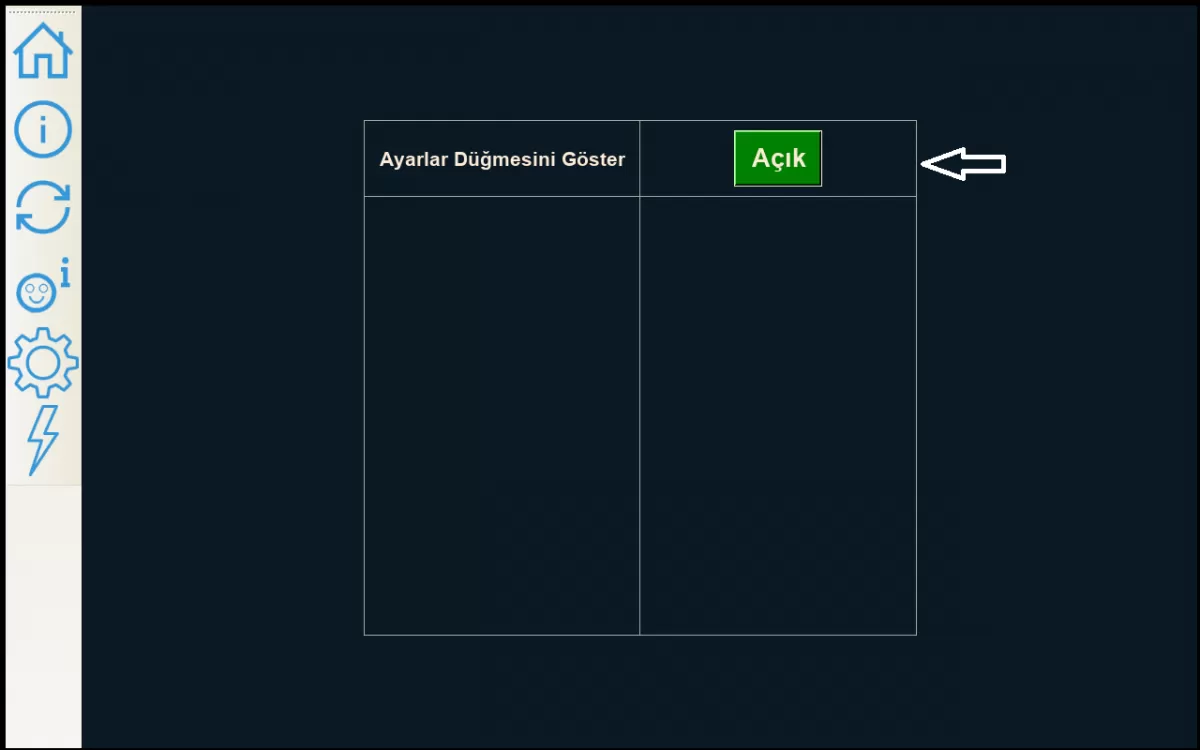
Image 1-1: Robot Options Screen
5- Follow the steps given in the link to turn off your robot from the front screen and restart it. (click to see the Shutdown Screen)
Always turn off and restart your robot from the front screen of your robot by following the steps in Image 1. Do not force your robot to turn it off by pressing the power button on the back.
Image 1: Robot Shutdown and Reboot Screen
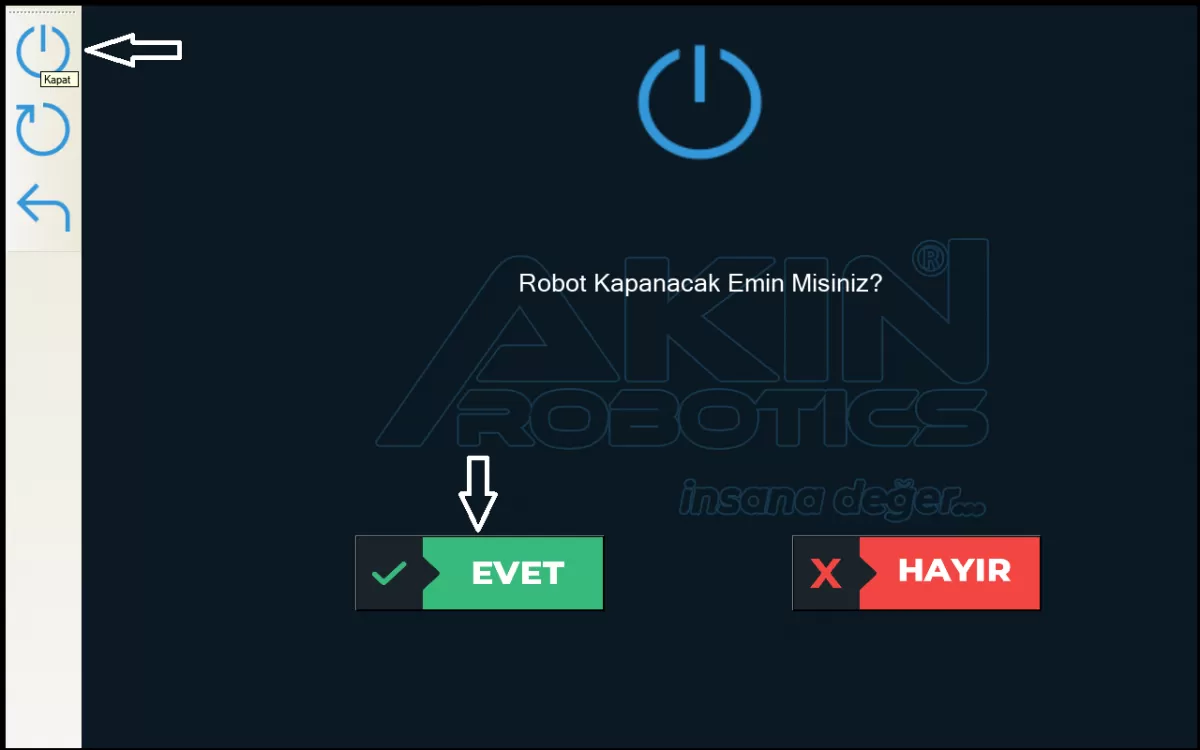
Image 1-1: Robot Shutdown Screen
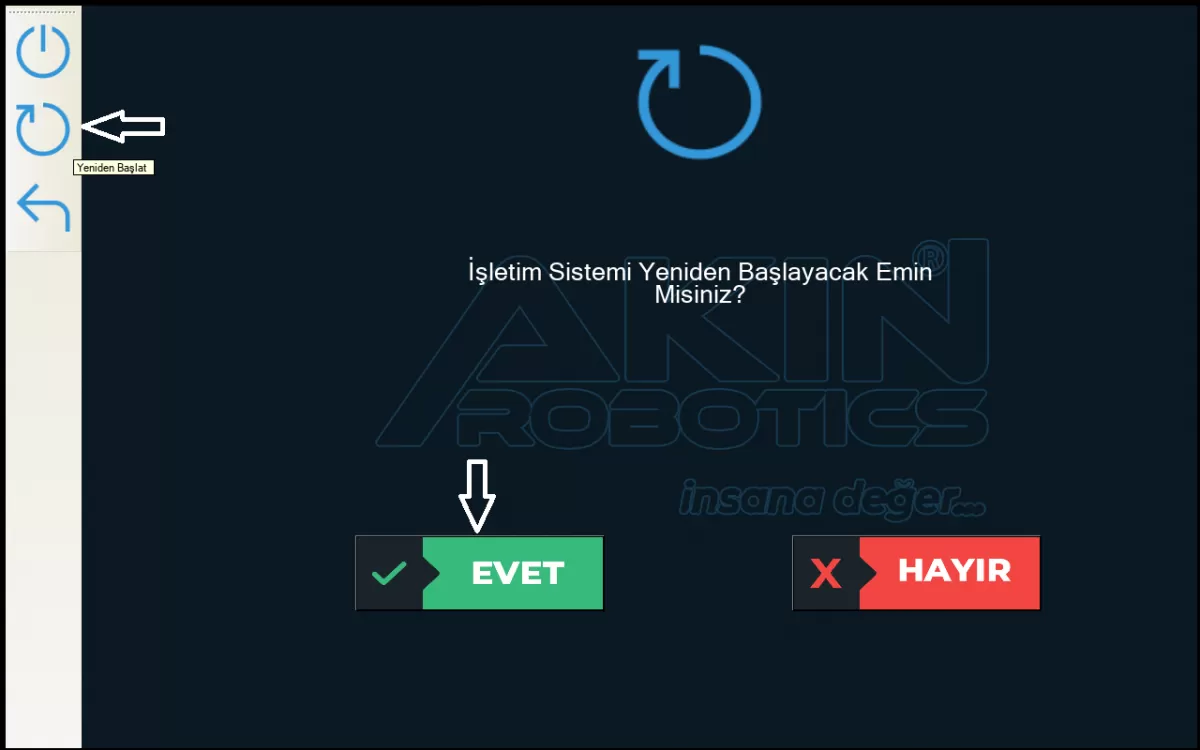
Image 1-2: Robot Reboot Screen